
Building a pattern
Two walkthroughs of the trig view, each building a pattern one gesture at a time. The first shows what the trig types do to a sequence, the second what decides how long each note lasts. Trigs is the reference behind both: what every colour means and which modifier writes it.
Writing a pattern, one gesture at a time
The quickest way to get a feel for the trig types is to watch a pattern grow. Everything below happens on one sequencer in C minor (see Chords and scales for how key and scale are set), and each figure changes exactly one thing from the figure before it, so you can attribute every difference to the gesture that caused it.
1. Plain trigs. Start with a standard trig (no modifier held) on steps 1, 5, 9 and 13 of row 1, the bottom row, which in C minor plays C3.
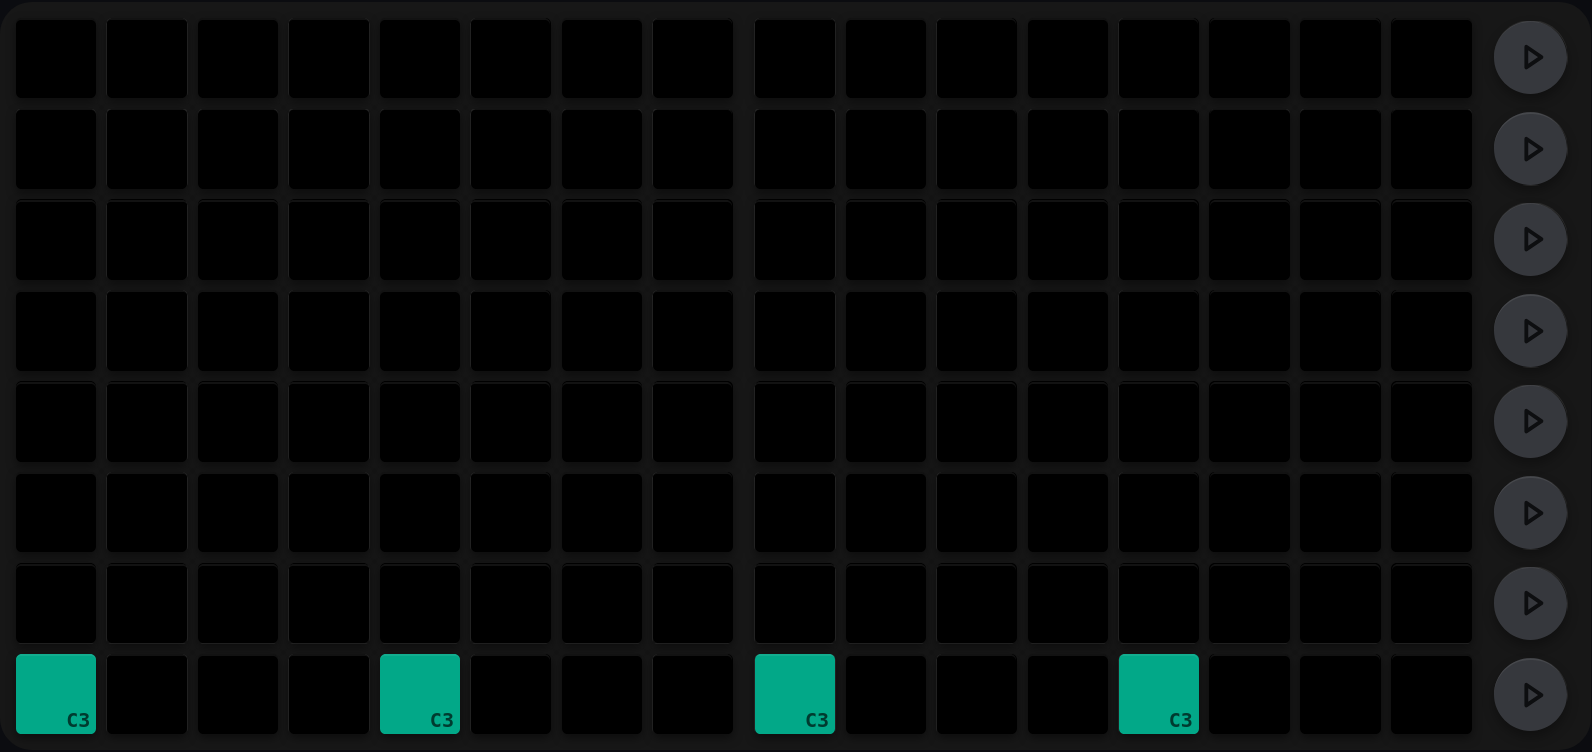
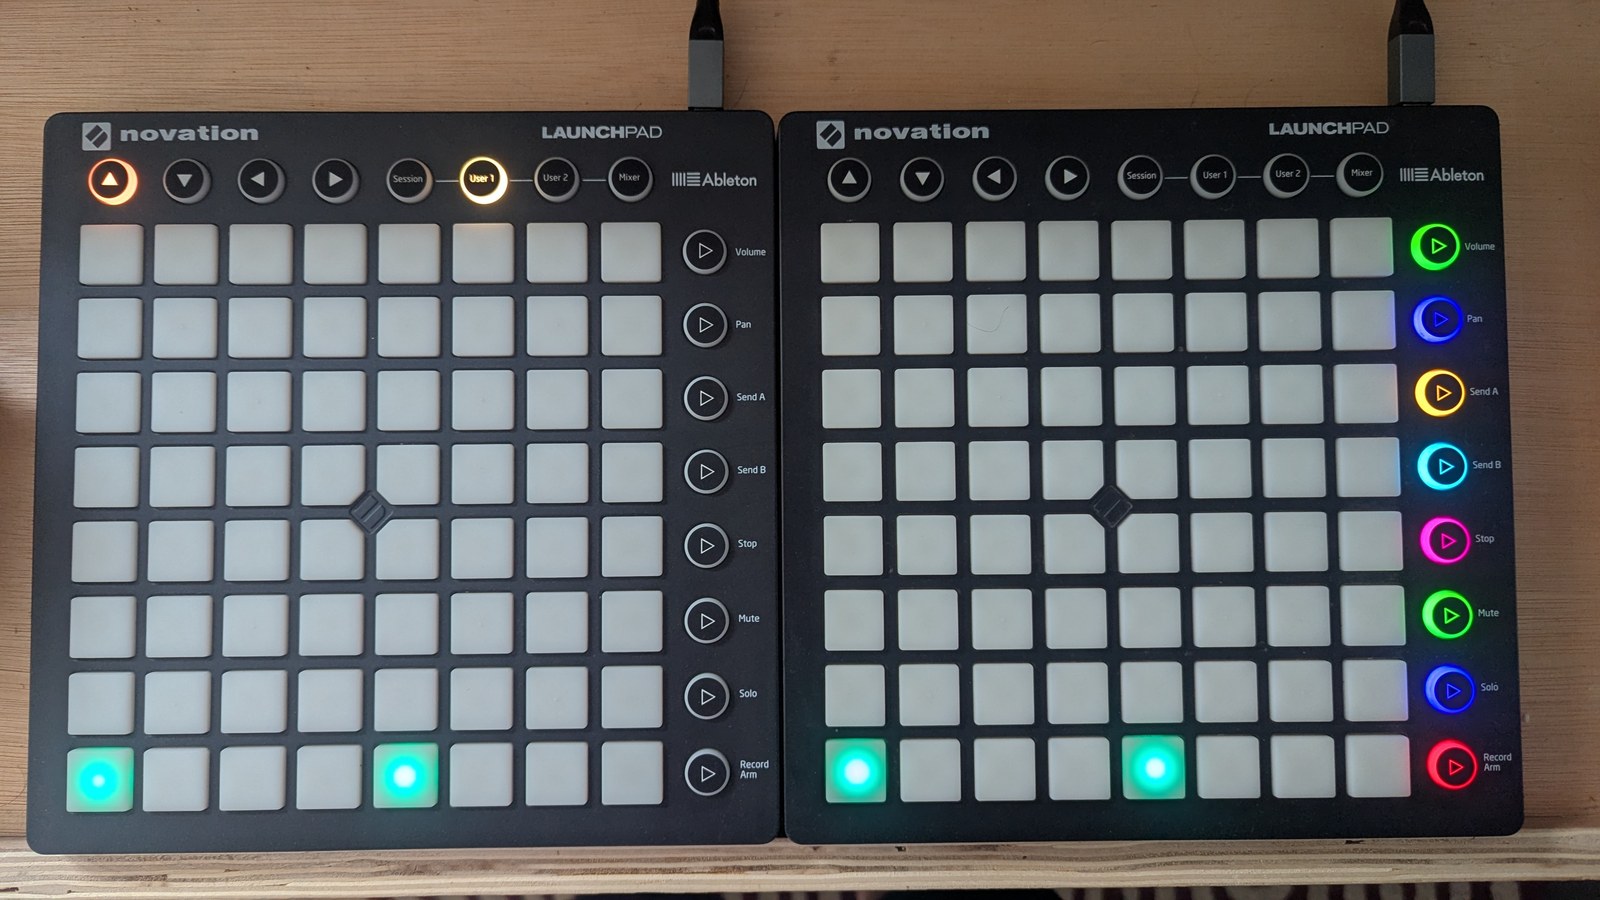
One note, four trigs: C3 on steps 1, 5, 9 and 13.
These fire every time round, and give you a steady spine for everything else to hang off.
2. A chord. The grid is 8 rows × 16 steps, and on a synth sequencer each of the eight rows is a note, so write the same four steps on rows 3 and 5 as well.
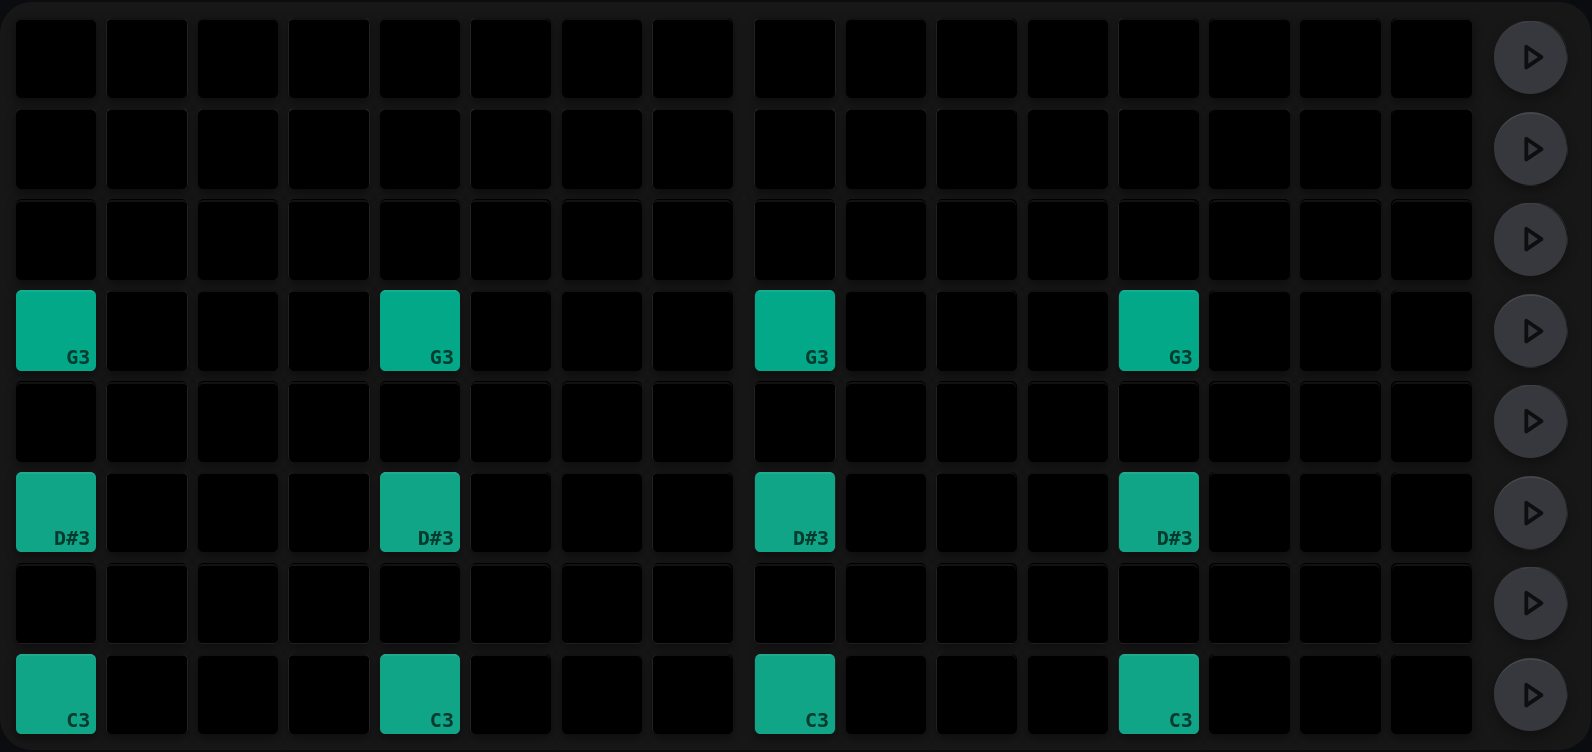
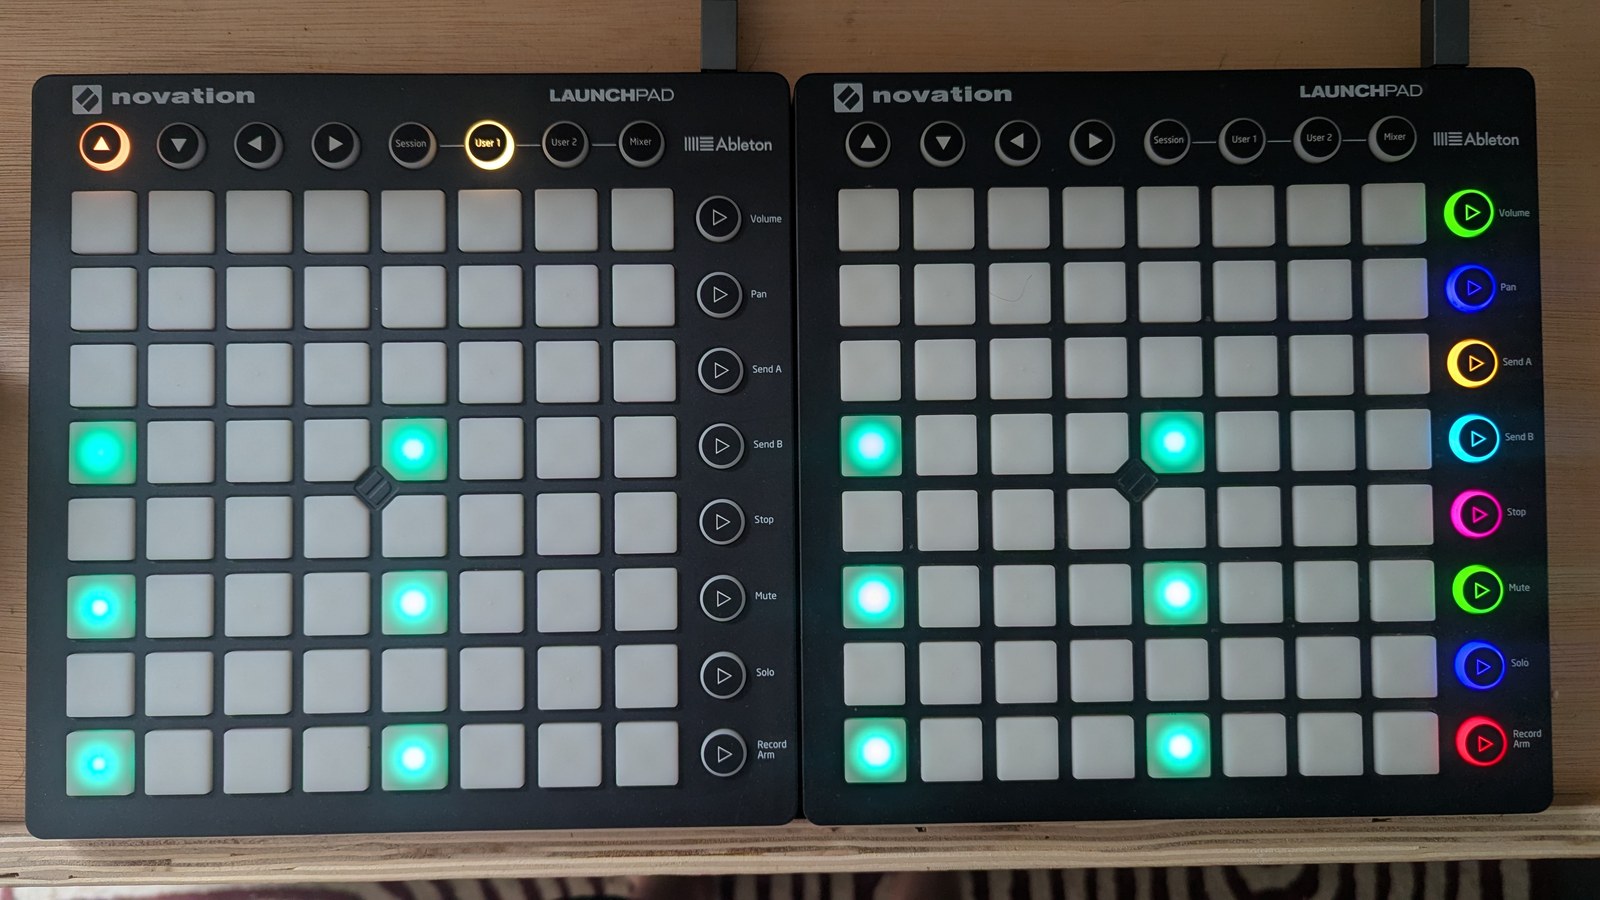
The same rhythm on three rows becomes a chord: C3, D♯3 and G3.
Same rhythm, three rows, and you have a chord. The note labels are doing the teaching here.
3. Muting a trig without deleting it. Now hold MUTE and press step 5 on all three rows.
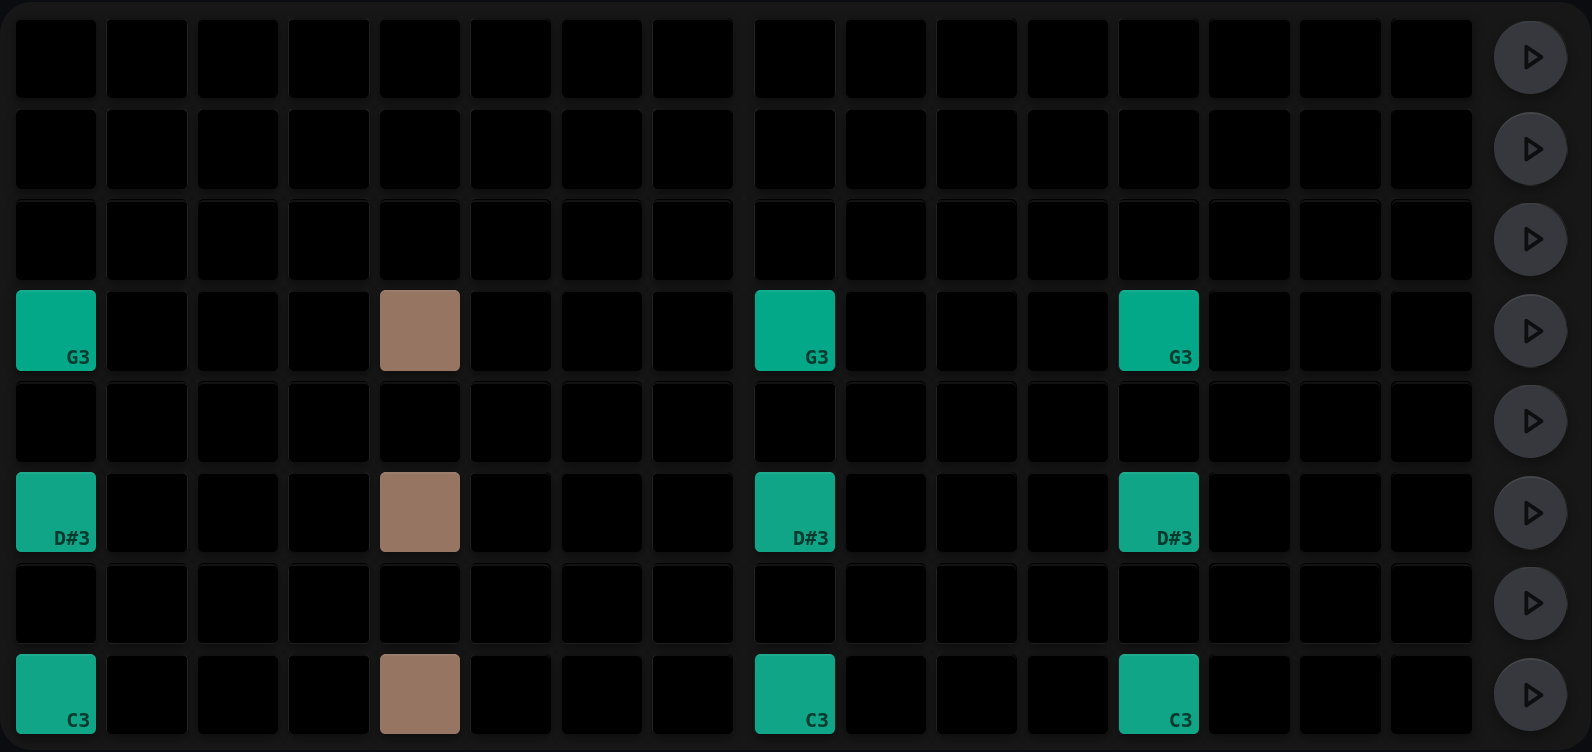
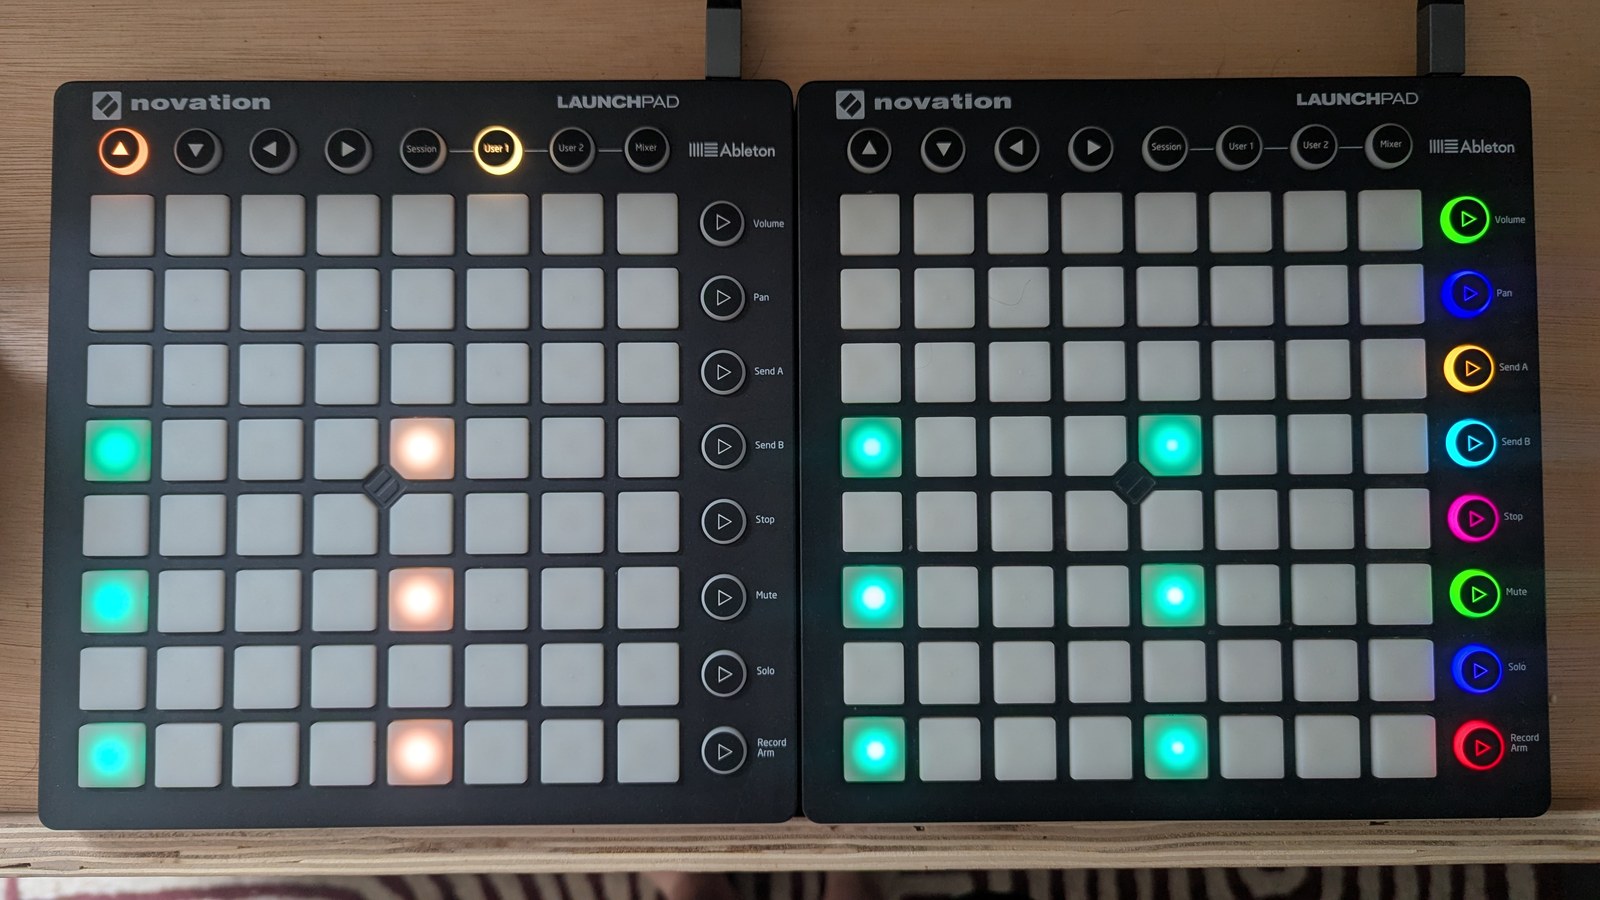
Step 5 held MUTE: the trigs stay visible in tan, but stop firing.
They remain lit up but are disabled, which is useful for paring back a busy pattern that you might want to reprise later on.
4. Percentage chance. Hold SHIFT and press step 9 on each row. They light green, and how pale they are tells you how likely they are to hit.
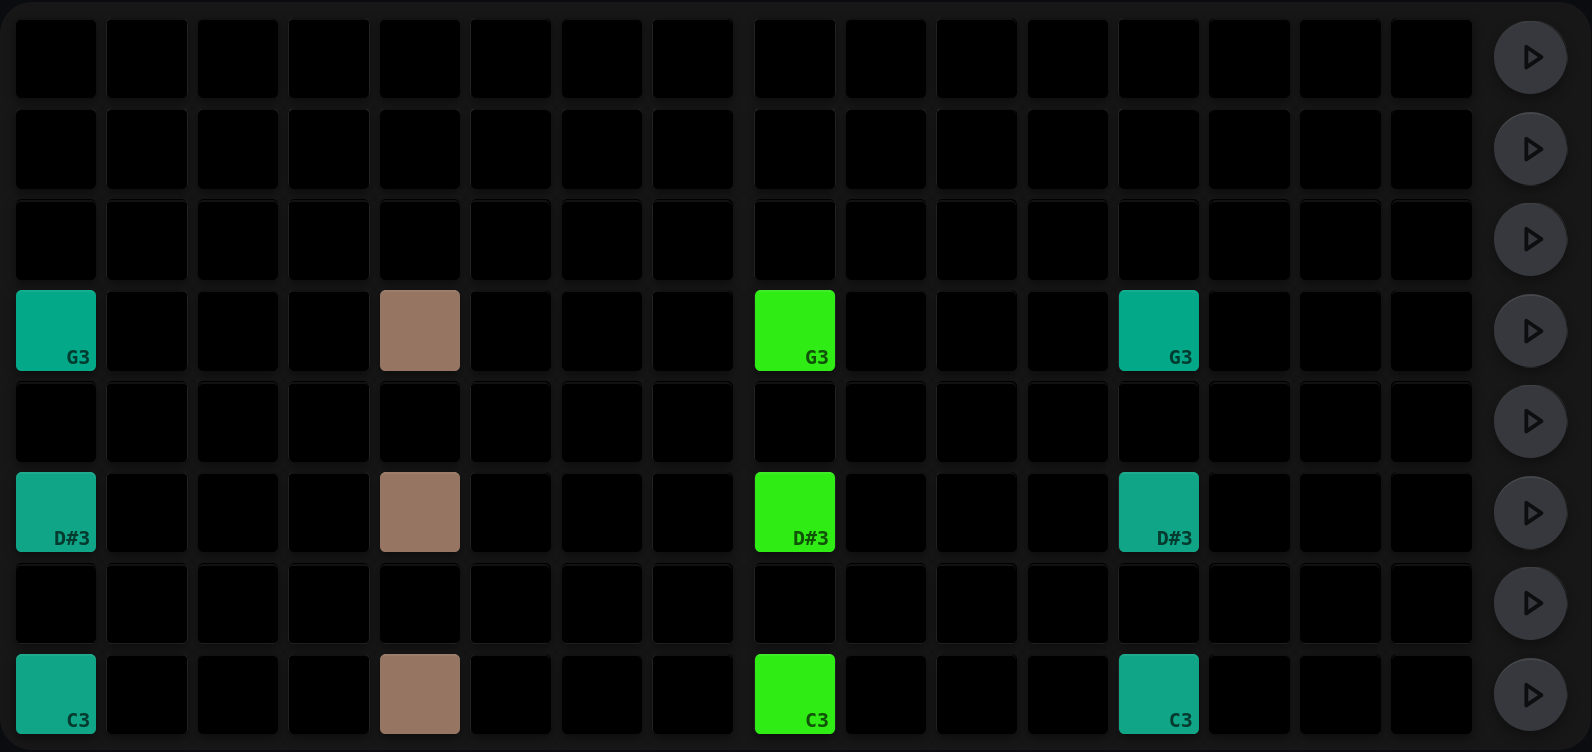
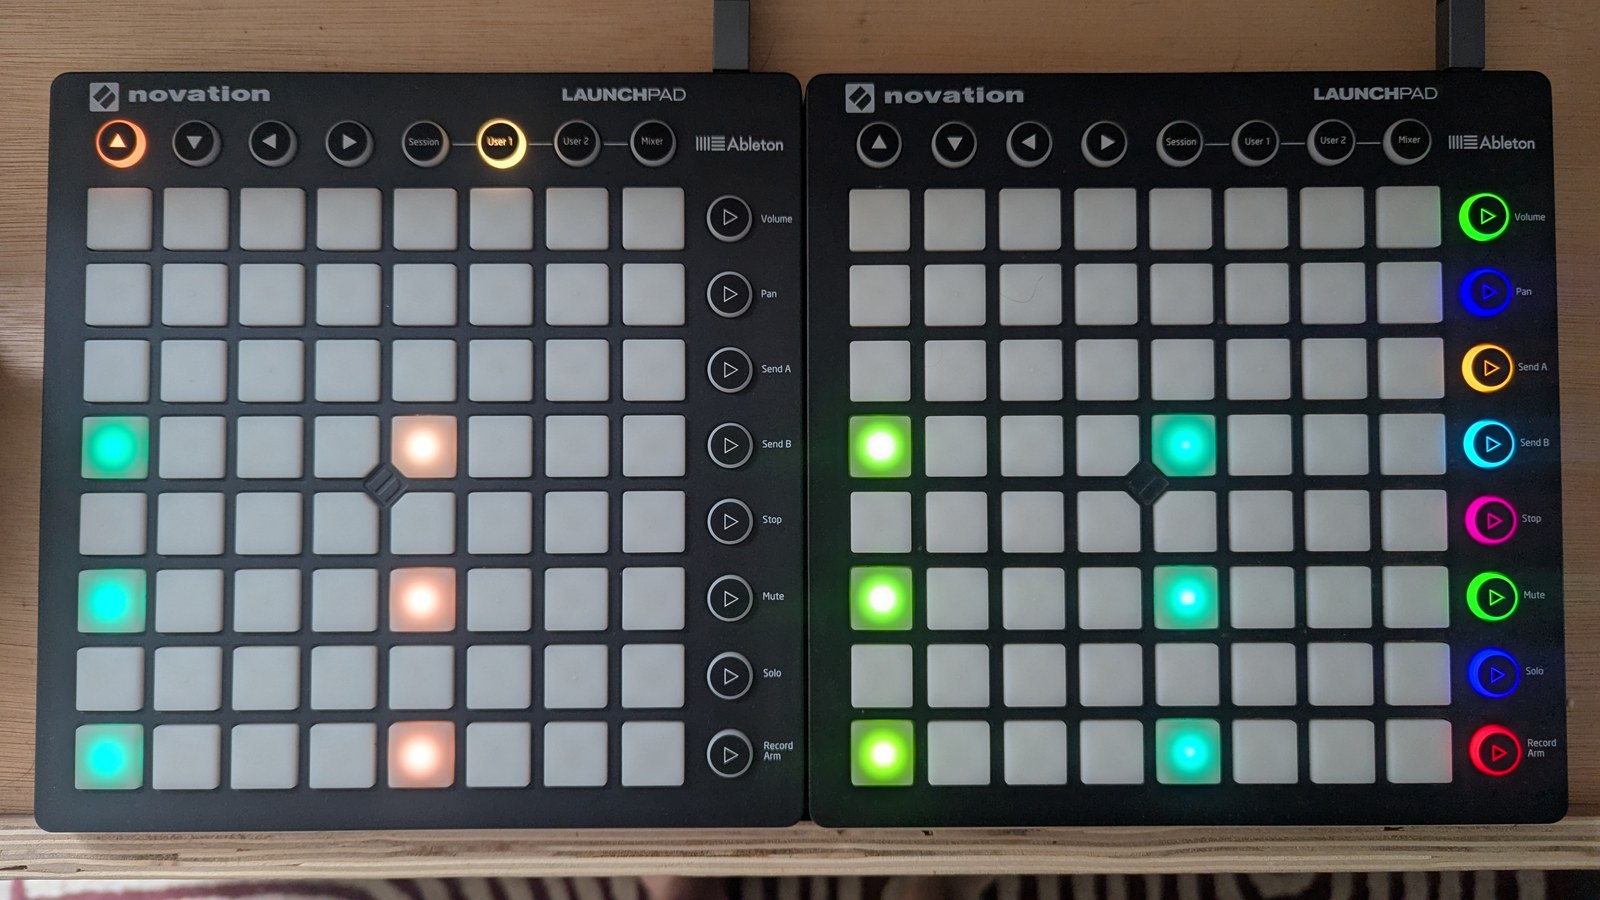
Step 9 held SHIFT: percentage-chance trigs, in green.
The bottom knob for that sequencer on the relevant launchcontrol sets the threshold, so you can dial the whole row from “barely there” to “always” without touching the pattern itself. Note that SHIFT toggles a step between OFF and percentage chance, so converting a step that is already on takes two presses.
5. Mod chance. Holding REC ARM and pressing a step cycles it through the modulo divisions. One press on step 13 of each row puts it on MOD1.
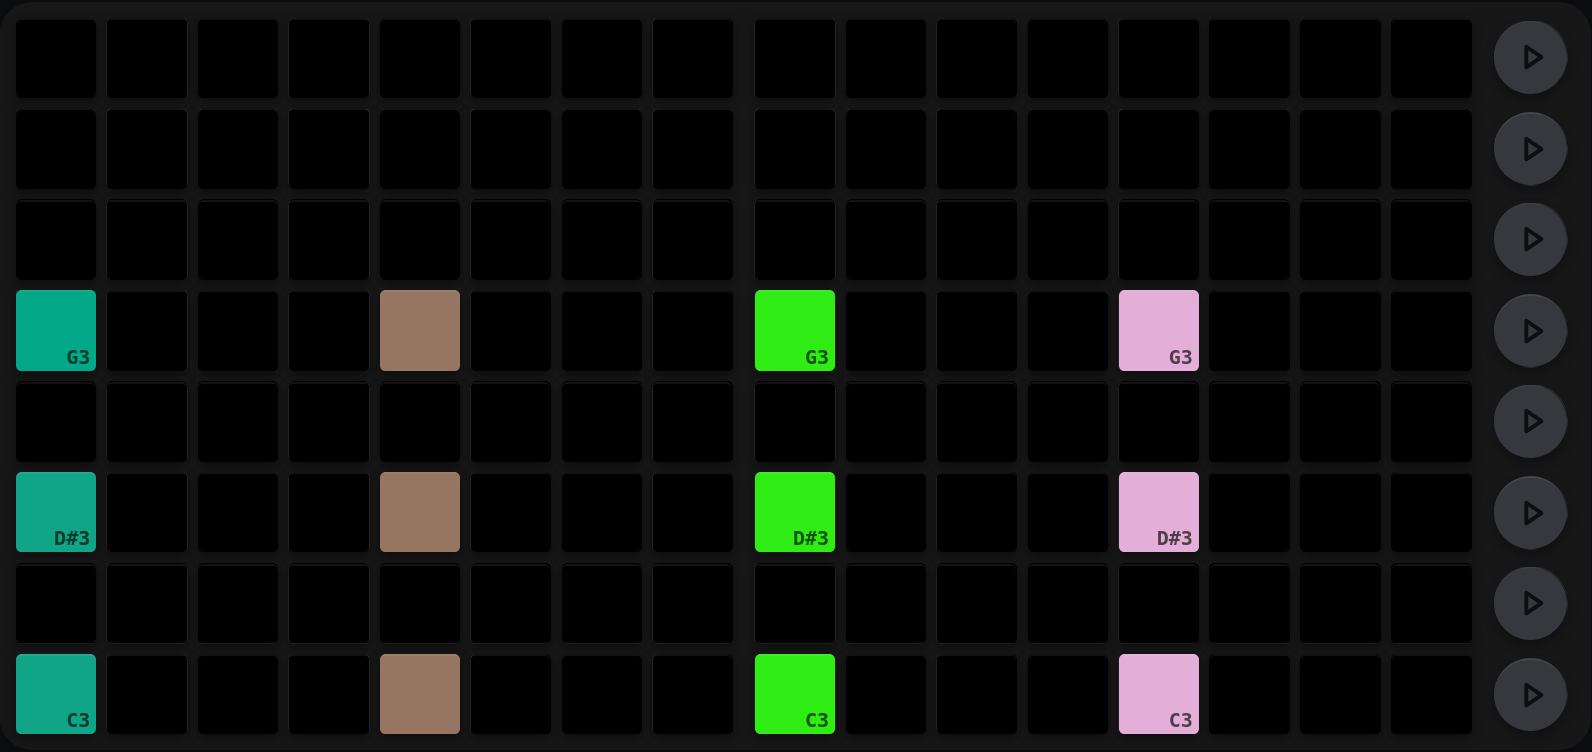
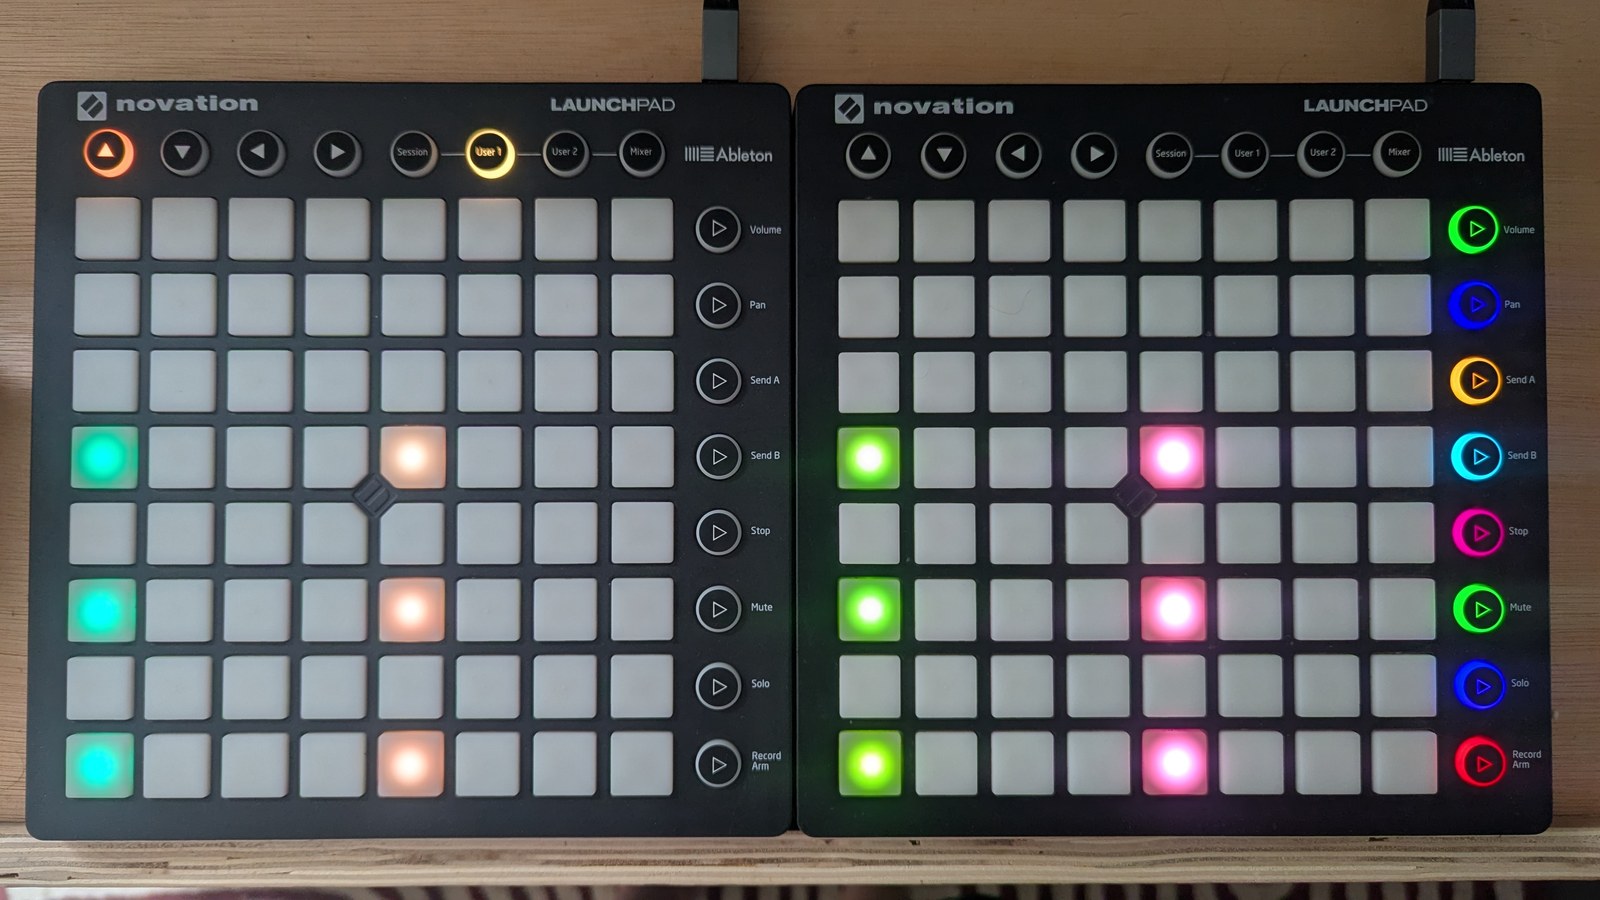
Step 13 held REC ARM: MOD1, in pale pink, fires on even bars only.
6. Longer cycles. Back in the grid, keep pressing REC ARM on a step to walk further up the divisions. MOD2 also hits every other bar but on the odd ones, MOD4 hits every fourth bar, MOD8 every eighth, and MOD16 once per sixteen bar cycle. Sprinkle those on steps 12, 14 and 16 and the pattern takes the full cycle to come round: the same sixteen steps, but never quite the same twice. The mod divisions read as a run: pink, lilac, then three deepening blues.
7. Inverting the condition. Swapping mod chance for inverse mod chance on those same steps (hold 8A) means they now hit every time except the fourth, eighth or sixteenth bar. Notice the colour changes from light blue → blue → dark blue, to mustard → dark orange → dark red. The same accents, punched out rather than punched in.
From here, Euclidean overlays will fill in the gaps algorithmically, the step views give each of those hits its own length and loudness, and the note arps change which note each trigger fires.
How long is a note?
The grid says when a note fires. How long it then lasts is decided somewhere else, and there are three routes to it: the step’s own duty value, a held trig across several steps, or the row’s play mode. They stack, which is worth seeing in order. Everything below is the same four-to-the-floor chord on three rows, so the only thing changing is the length of the notes.
(In these figures the middle row is the one selected for editing, which is why its trigs are a shade different from the other two.)
1. A chord, with the rows muted. Nothing sounds yet.
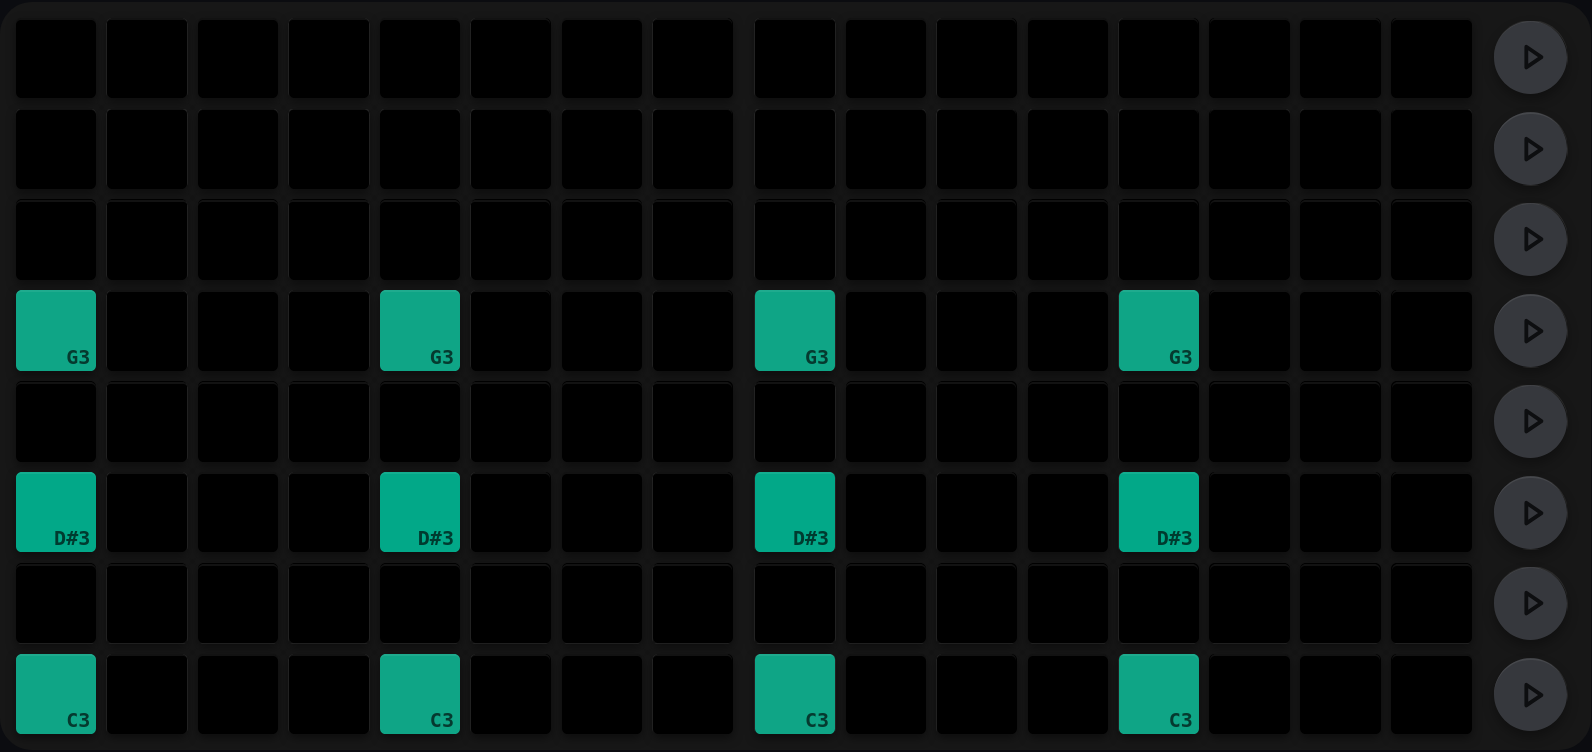
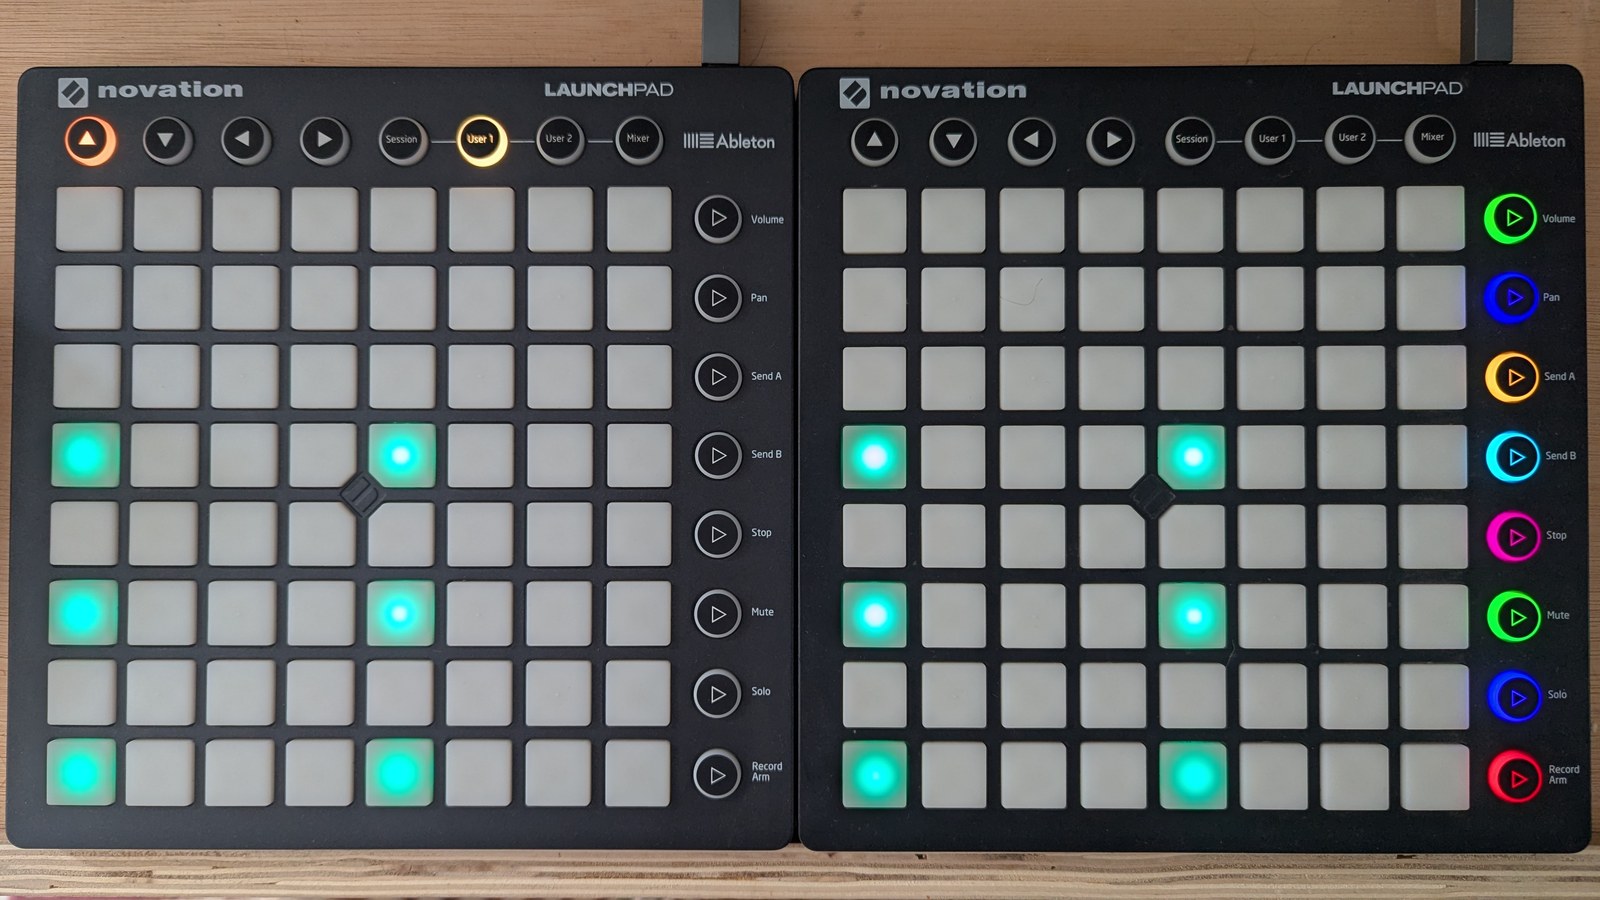
Twelve trigs written and not one of them playing. The row buttons down the right are all dark, which is what muted looks like: the pattern is there, waiting.
2. Unmute the rows. Press each row button.
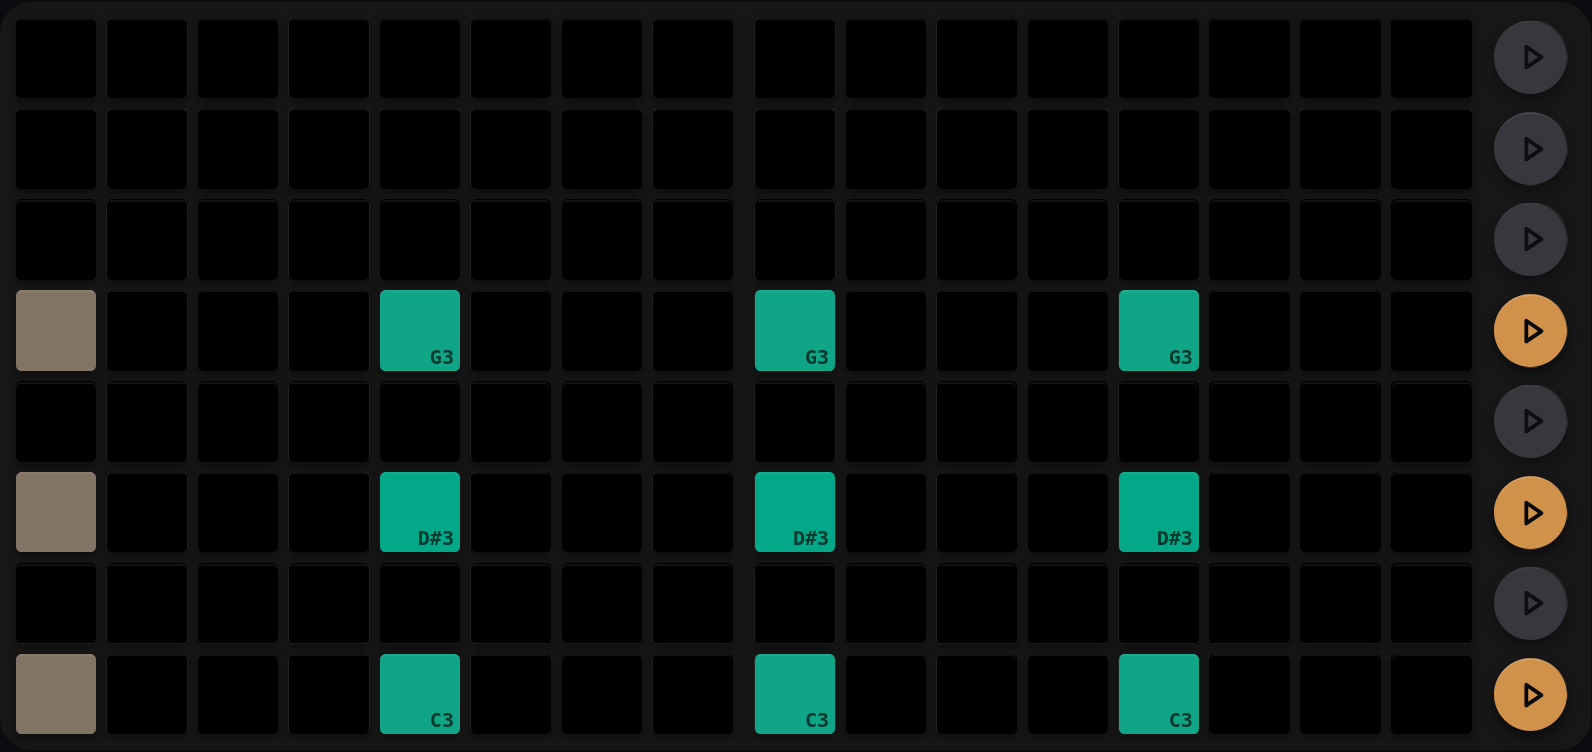
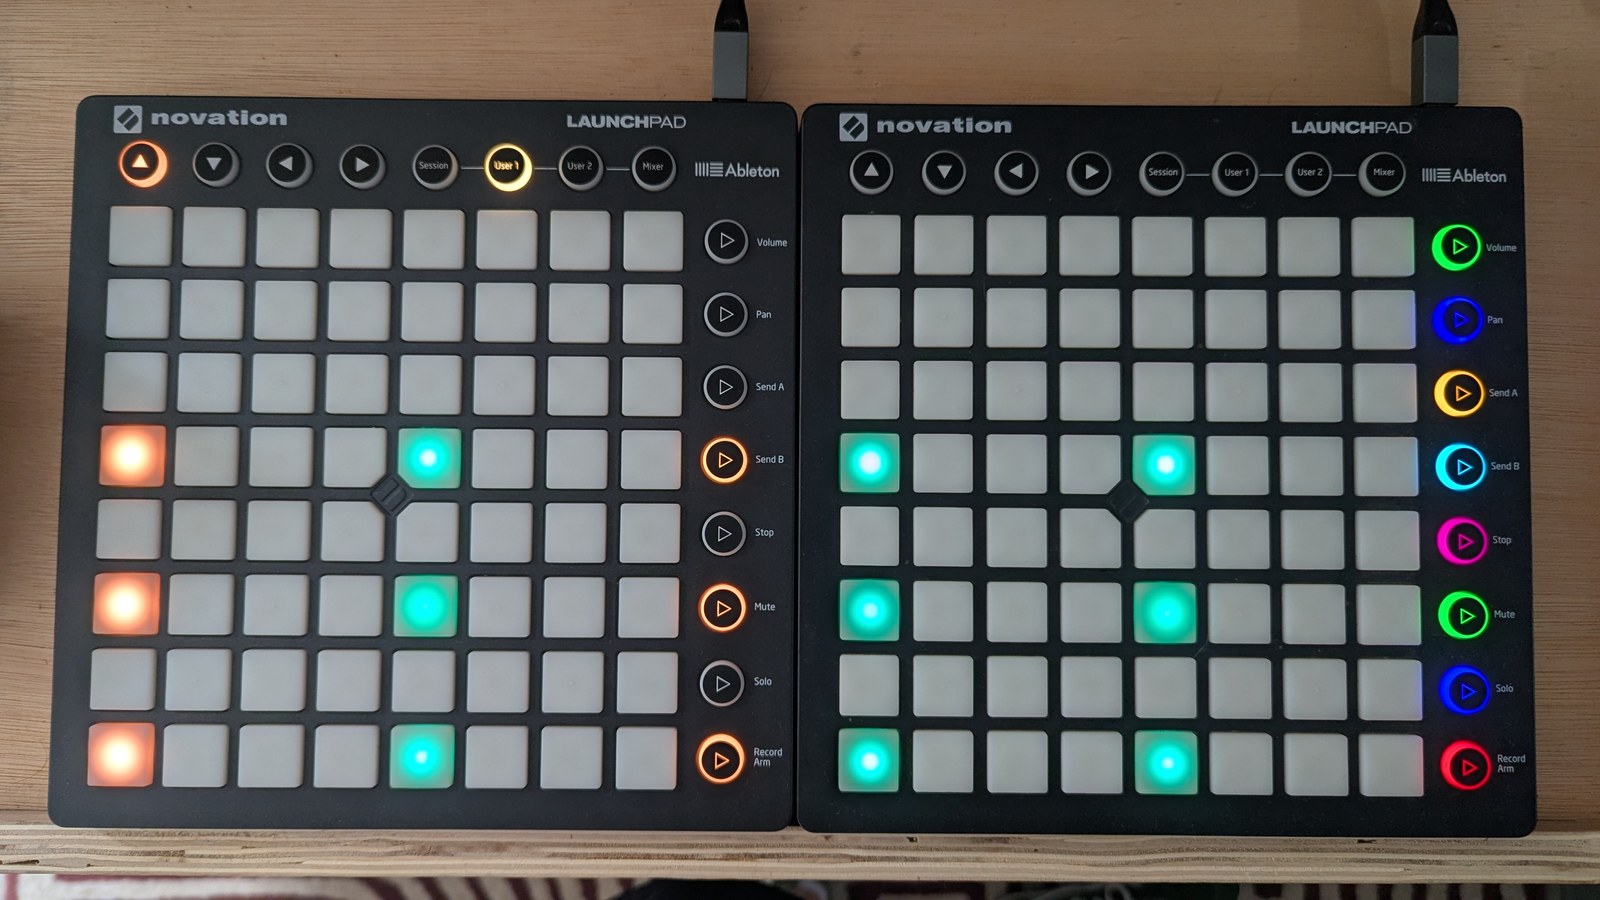
Orange row buttons mean unmuted, and now each trig fires. How long each note lasts is its step’s duty value (see Step values), so at the default of one sixteenth you get four short notes to the bar. The washed-out pads on step 1 are the playhead passing through.
3. Hold every trig across to the next one. Hold SOLO, press a start step, then an end step, and repeat until the bar is covered. Muted again first, because the pattern is easier to read when nothing is moving through it.
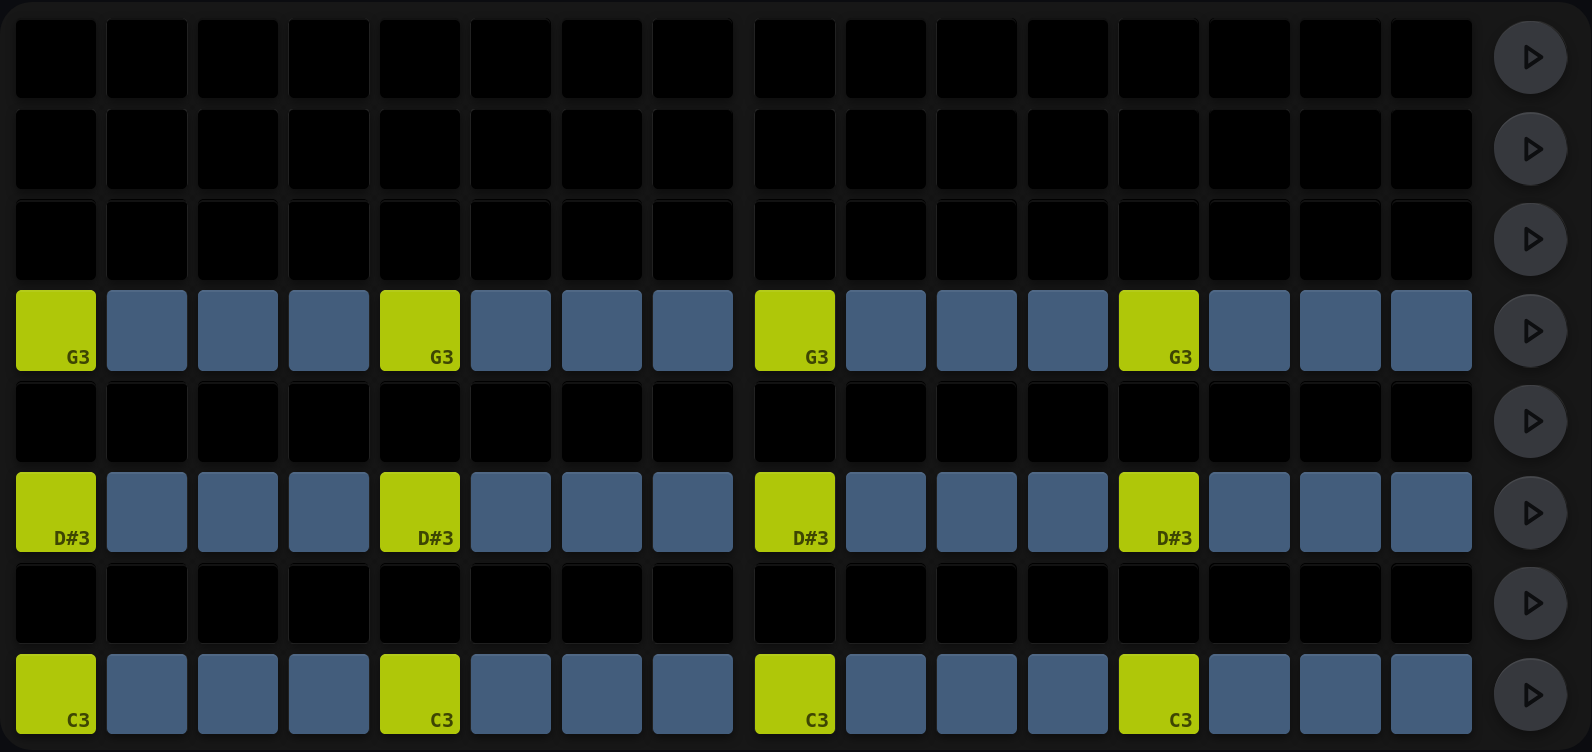
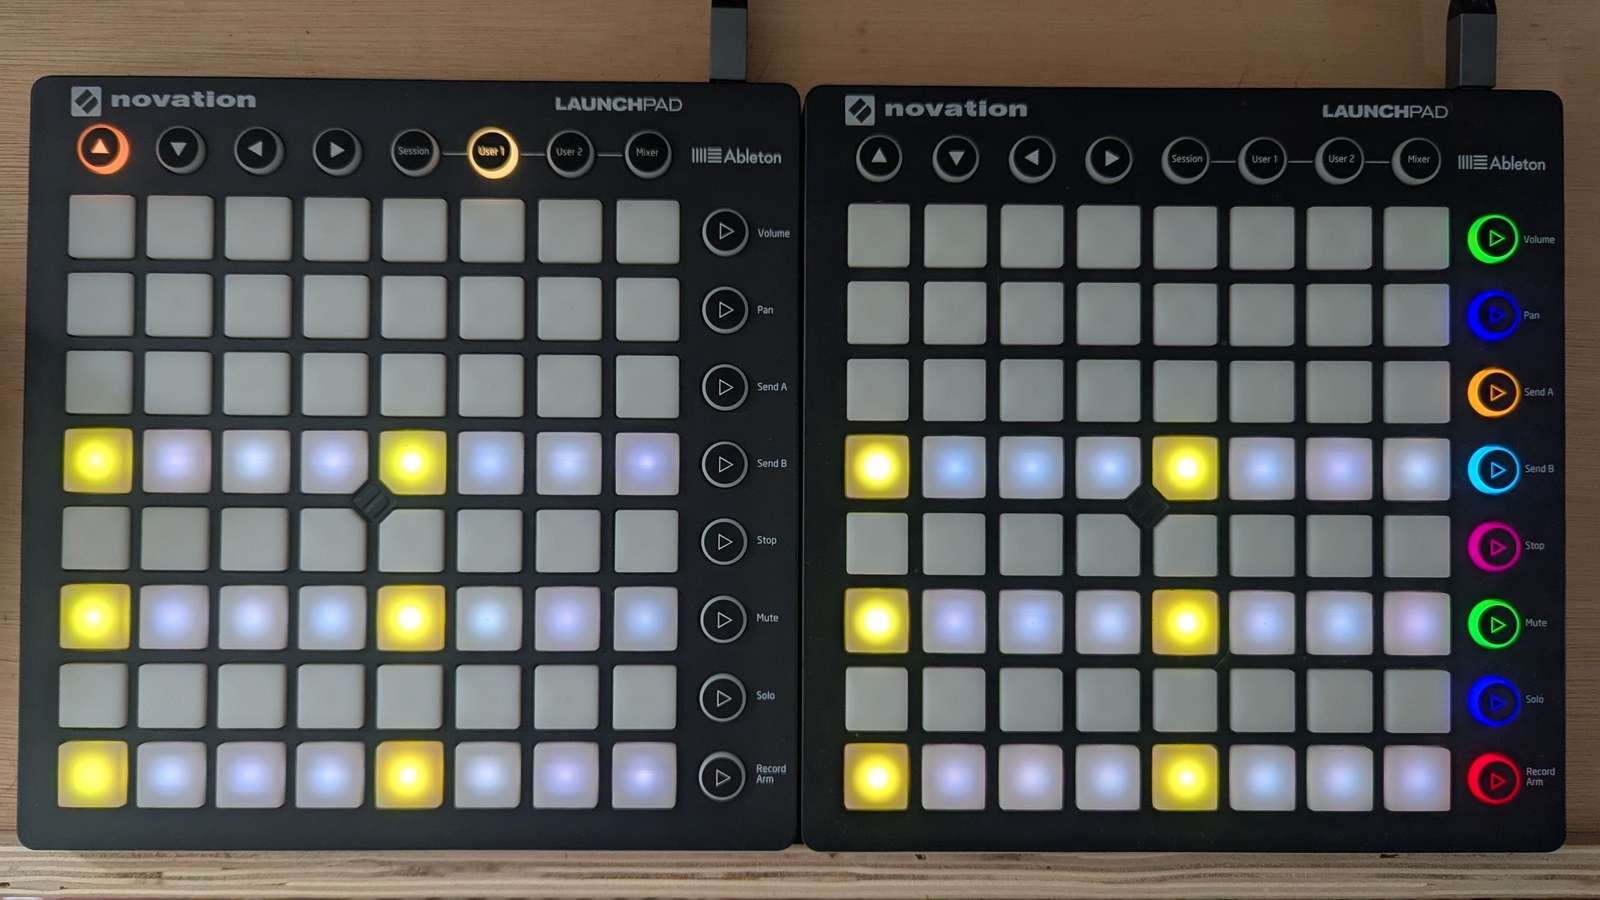
Four held notes to a row now, running 1 to 4, 5 to 8, 9 to 12 and 13 to 16, so there is no gap anywhere in the bar. The yellow-green pad is where each note starts and the slate pads behind it are that note still sounding.
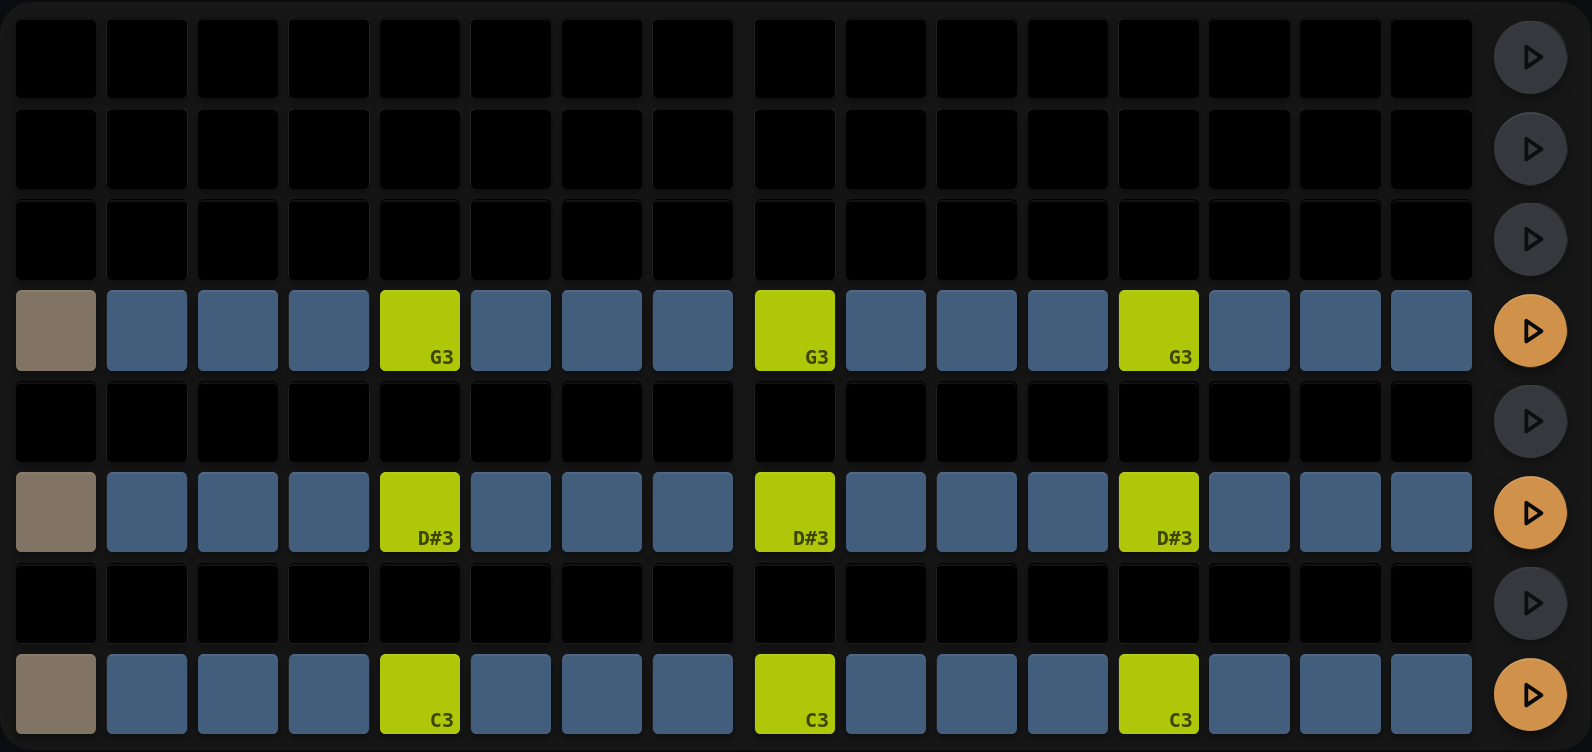
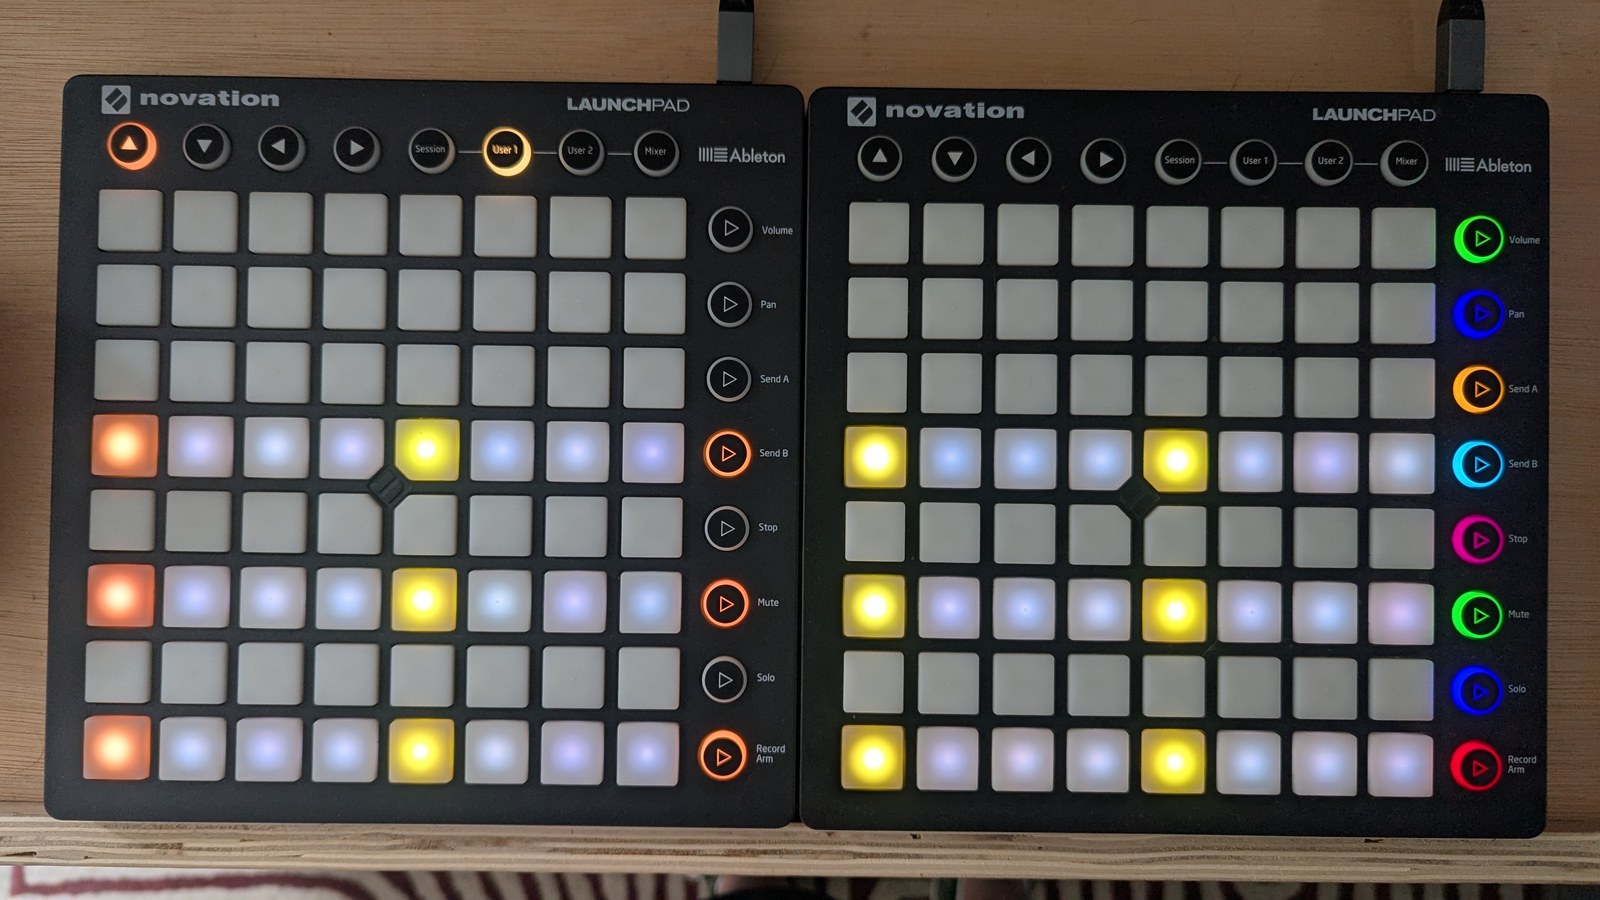
Unmuted, and the difference from step 2 is the whole point: the same four notes per bar, but each one lasts until the next begins instead of stopping after a sixteenth. Nothing retriggers in between. This is legato in all but name, written into the pattern by hand.
4. Or hold some and leave others short. Held trigs are not all-or-nothing: vary the regions and mix plain trigs in among them.
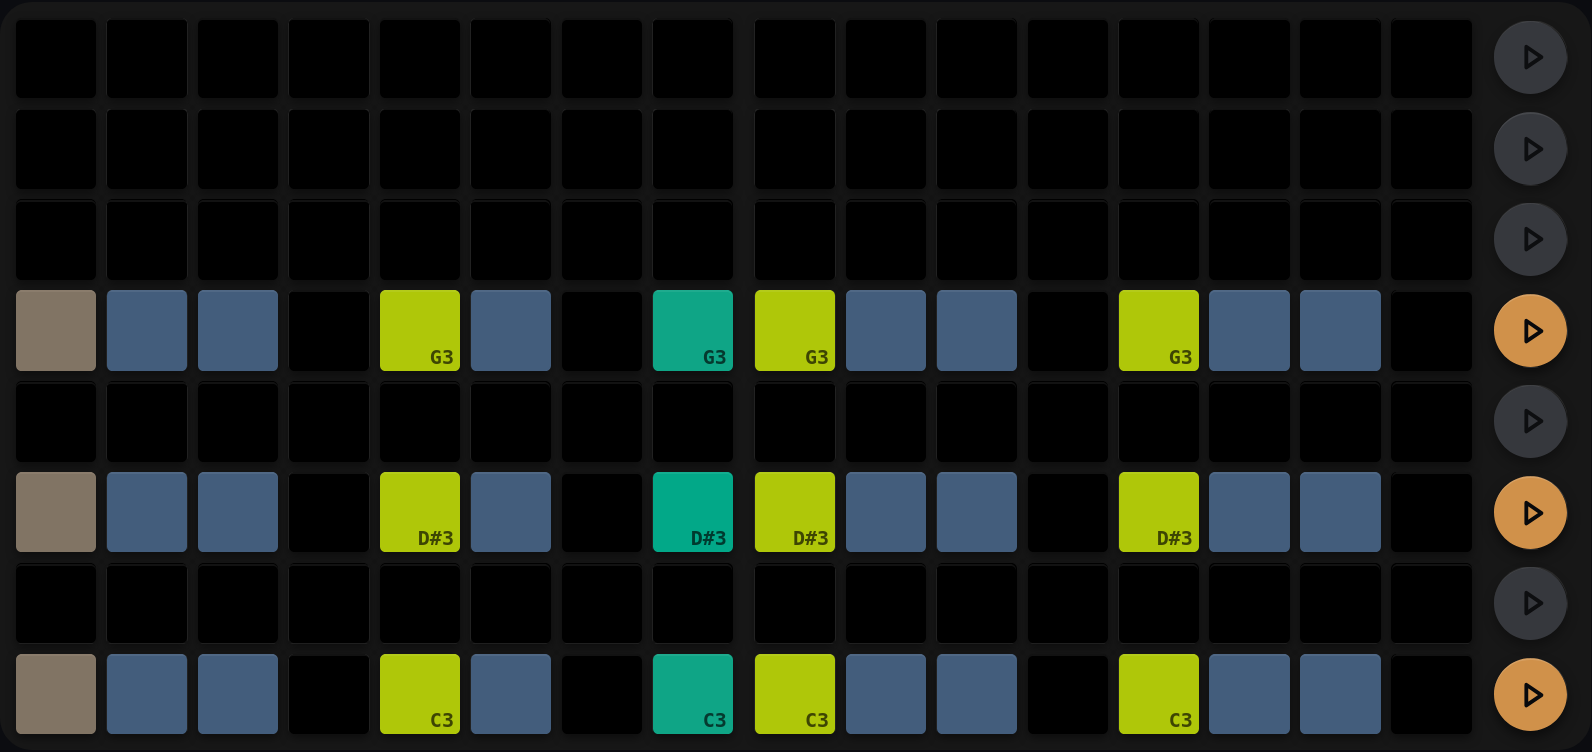
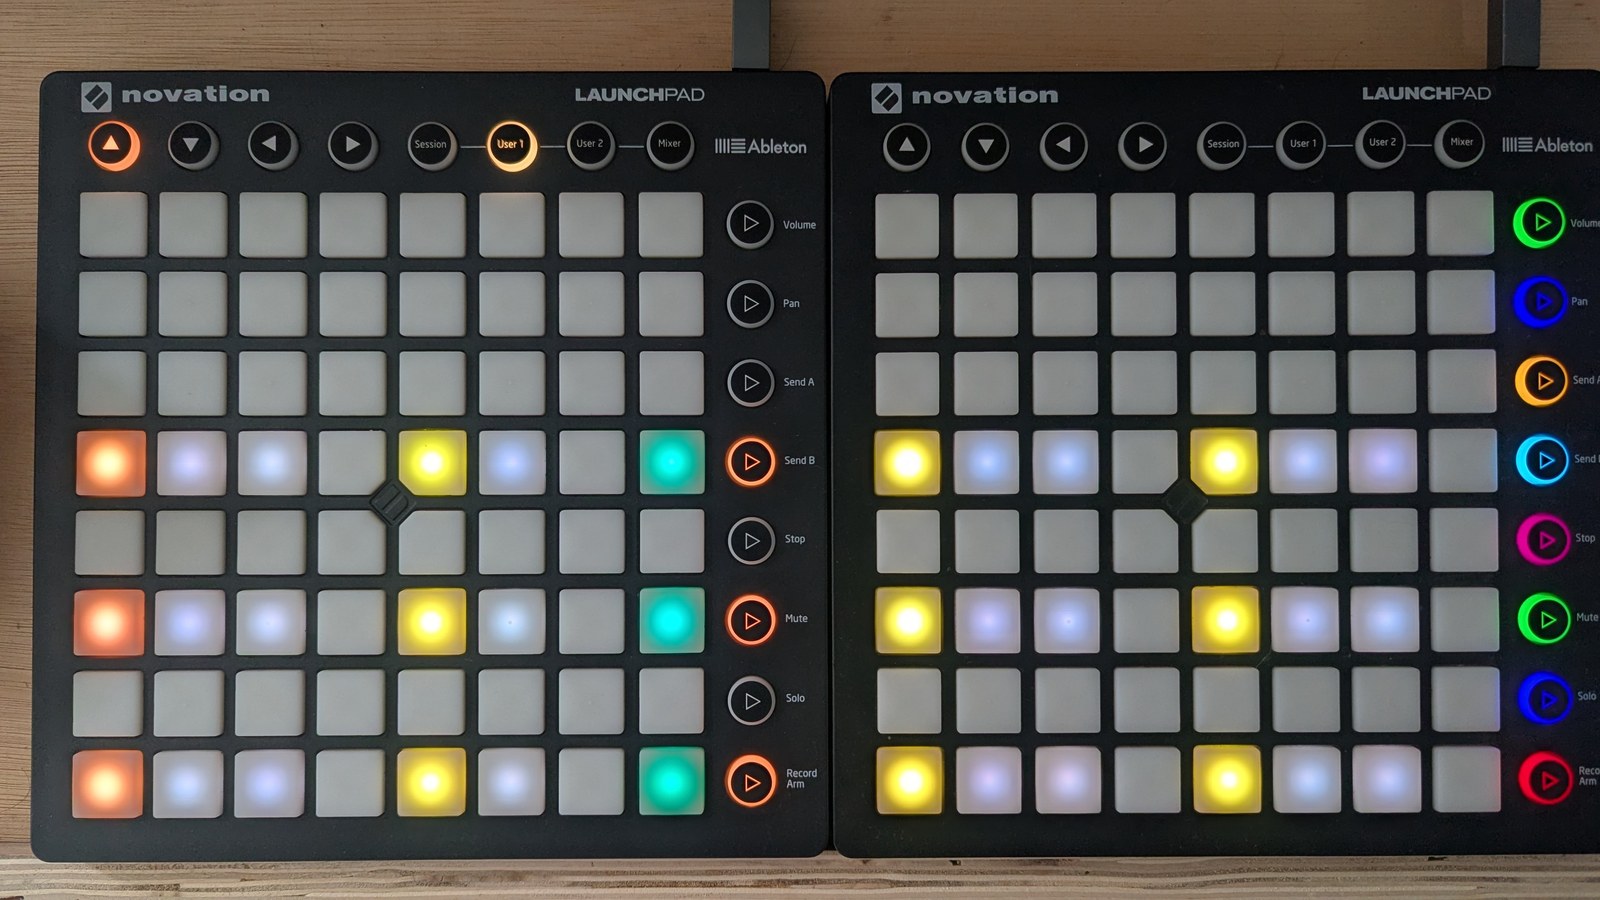
This is where held trigs earn their place. Each yellow-green pad starts a note and the slate pads behind it are that note still sounding, so you can read the length straight off the grid. Four held notes here, running 1 to 3, 5 to 6, 9 to 11 and 13 to 15, with a rest before each one and a plain teal trig at step 8 firing short in among them. (The first note’s start pad is under the playhead, which is why step 1 looks washed out rather than yellow-green.) That mix of long, short and silent is most of what makes a line phrase rather than tick.
5. The same legato, from the row’s play mode. Hold SOLO on the LaunchControl and press a row button.
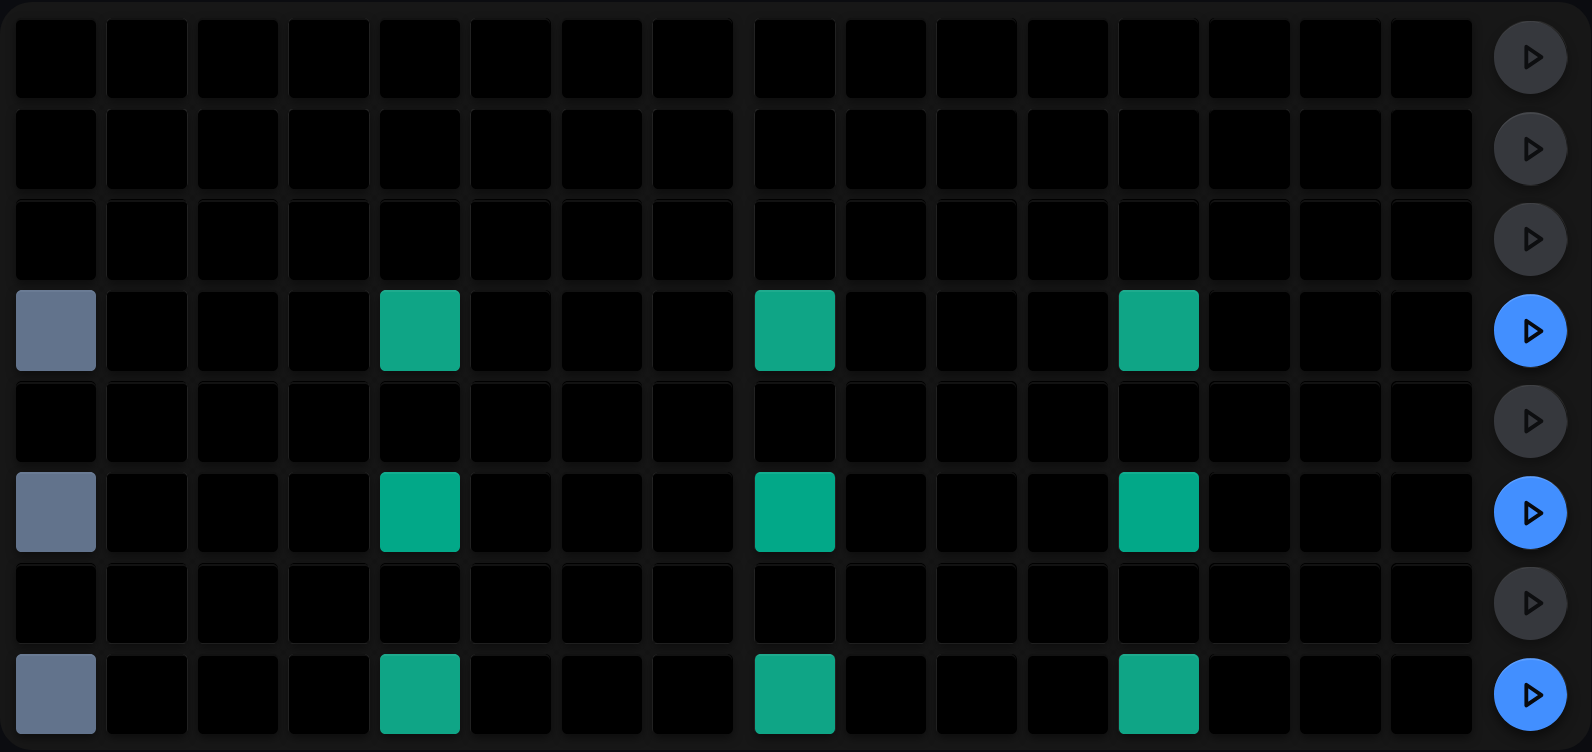
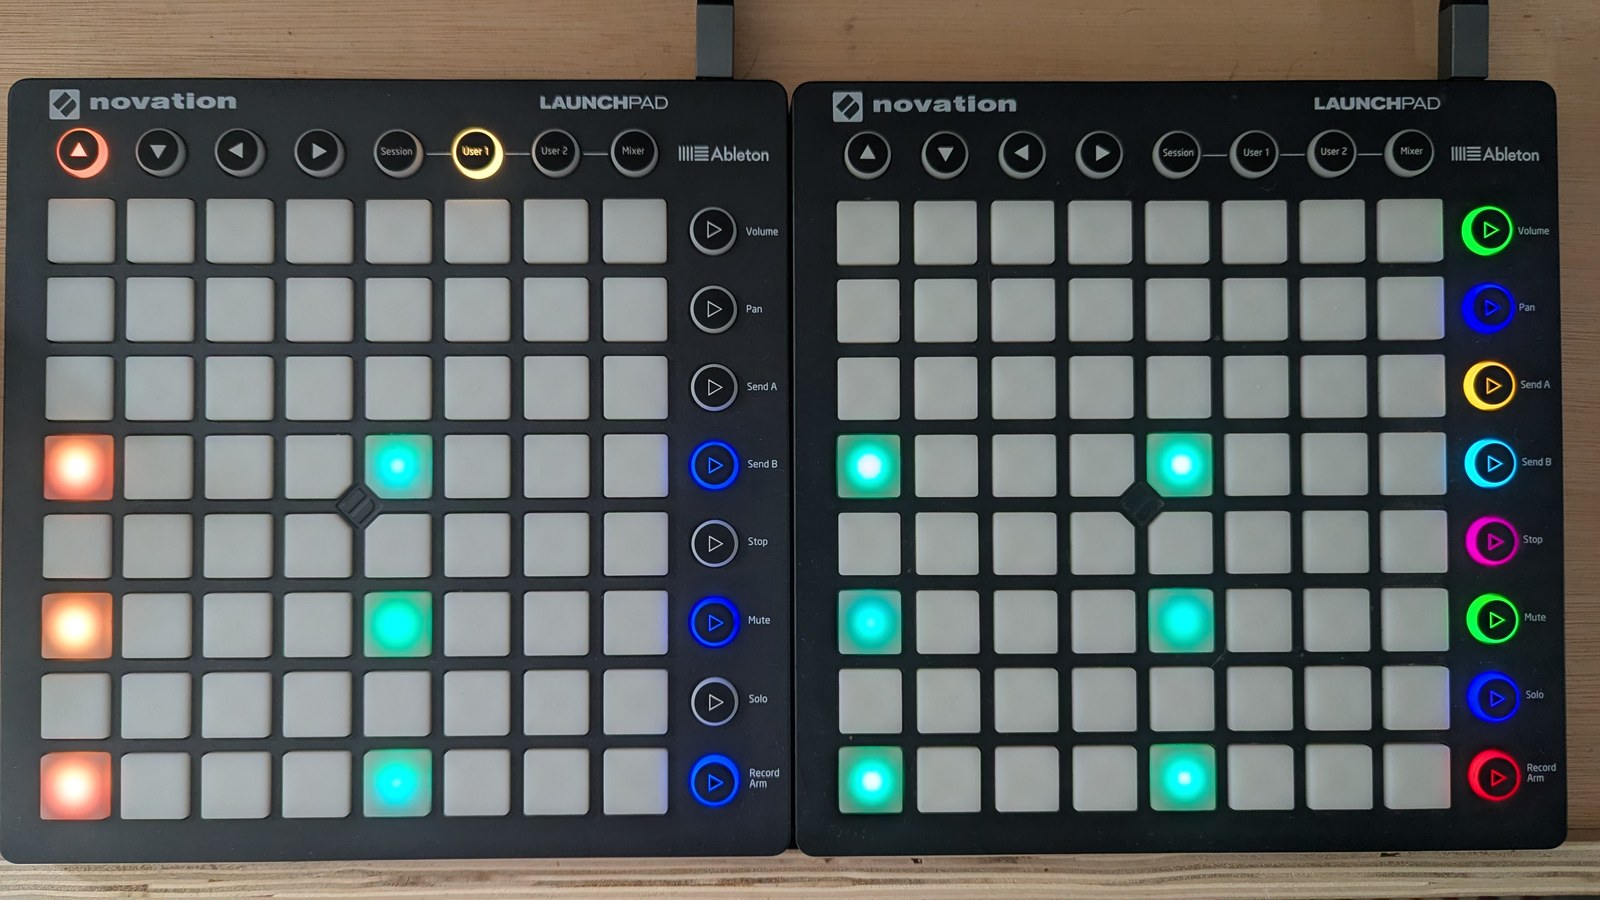
Blue row buttons are legato, and the grid is back to the plain four trigs. Each note is stretched to reach the next one, which sounds the same as holding every trig across to its neighbour. The difference is where the decision lives: held trigs are written into the pattern and travel with it, legato is a property of the row that you can switch off in a second.
6. A drone, when you want the chord to just sit there. Hold MUTE and press a row button.
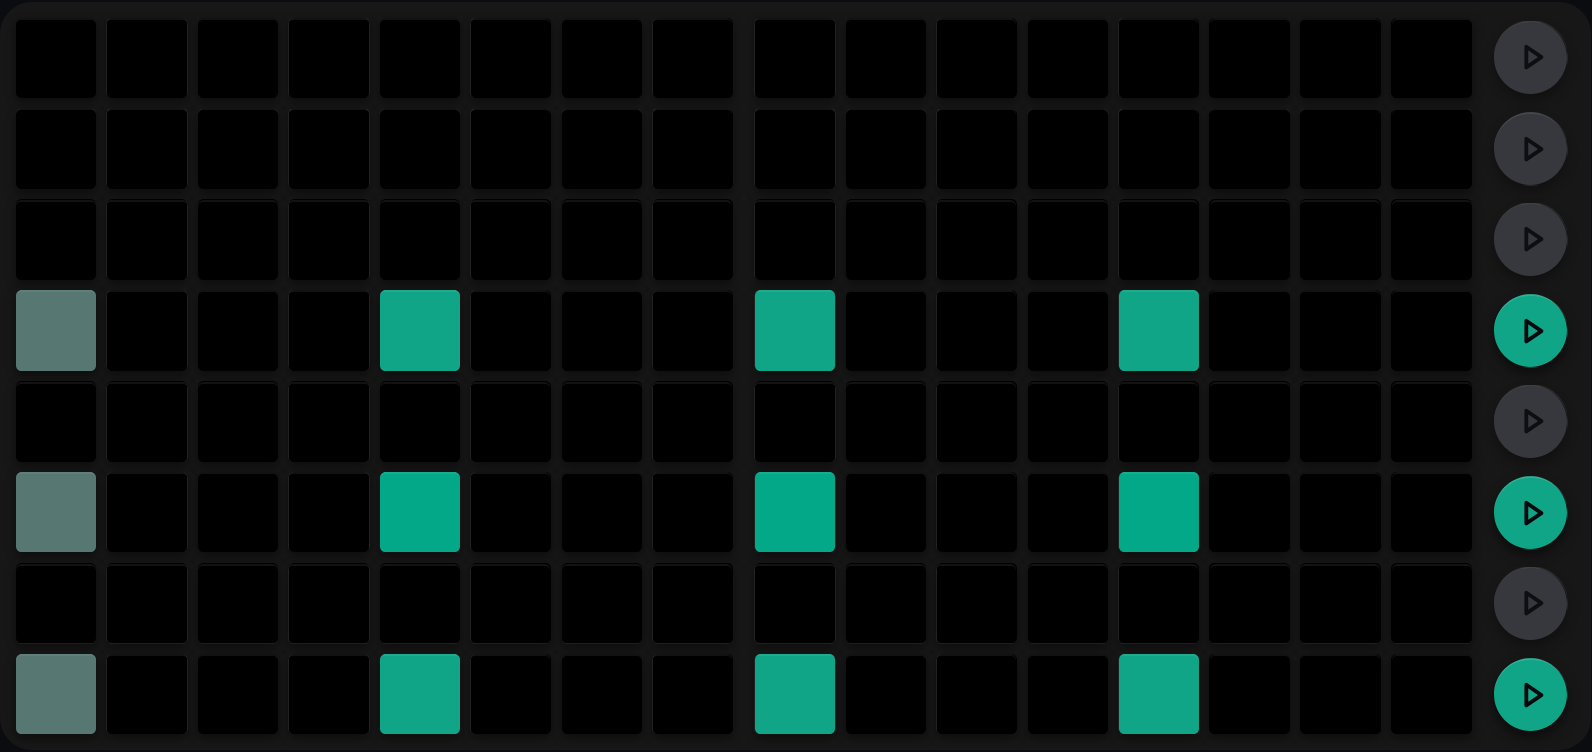
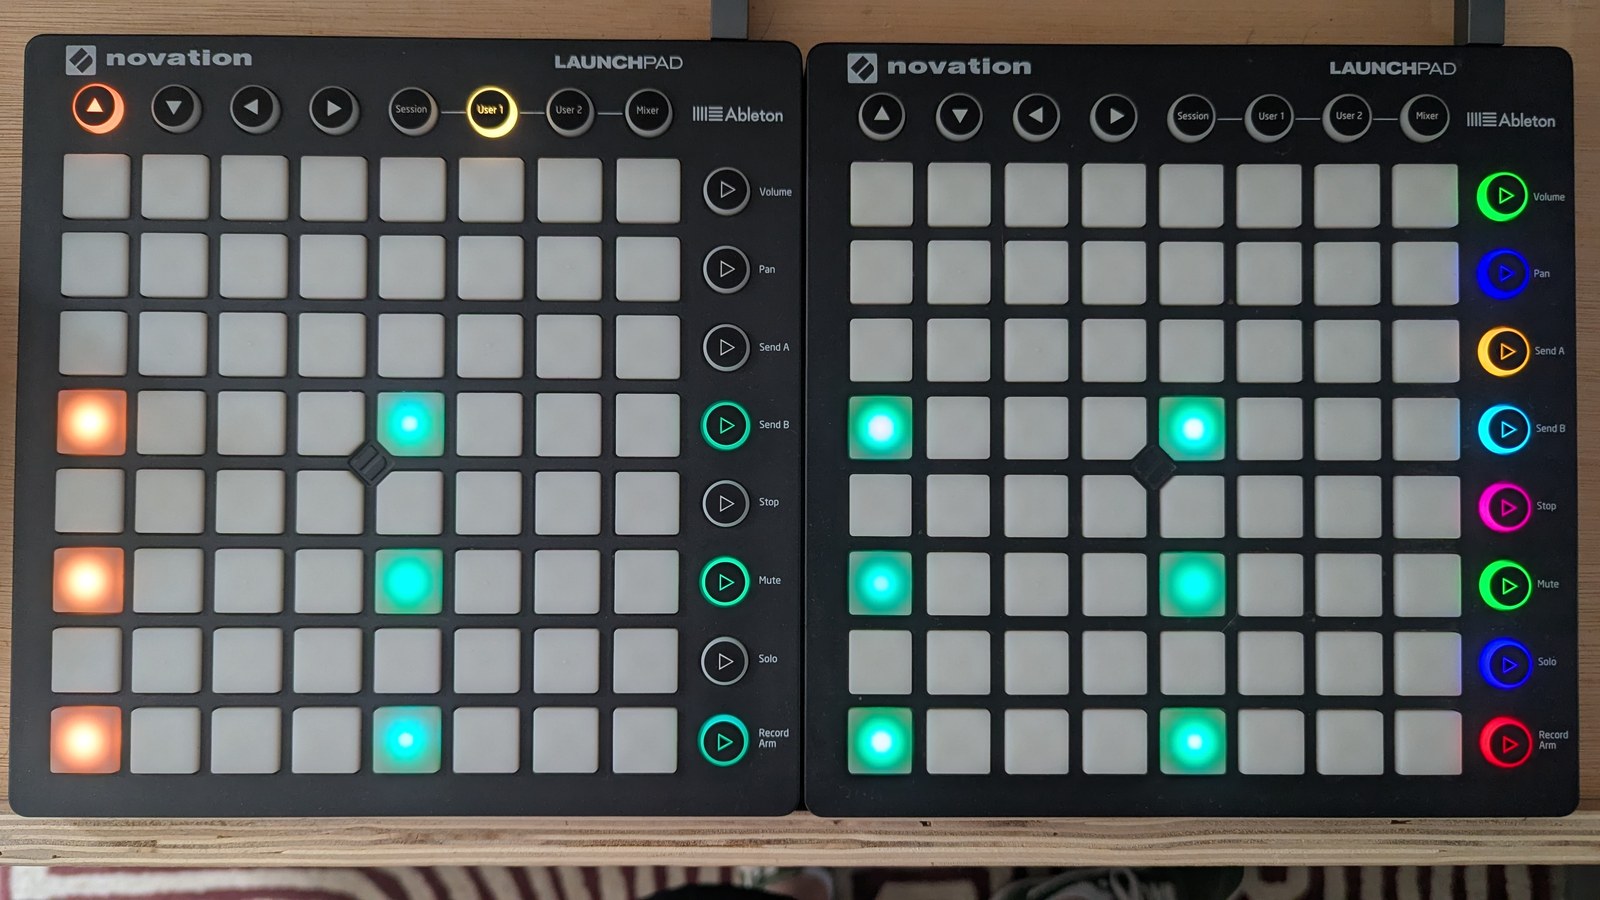
Green row buttons are drone. One note fires and is held indefinitely, and the trigs are ignored completely while it lasts, which is why the grid looks identical to the figure above and sounds nothing like it. Useful for a pad you want to hold under a section, and instant to leave.
So: duty for the length of one hit, held trigs for a shape you want to keep, legato for the same effect as a switch, and drone to leave the pattern out of it. Row play modes are covered on their own in Mutes and row states.
Modulo Division Reference
The 16-bar cycle counts bars 0–15. Mod and InvMod conditions evaluate at the bar level (not the step level):
| Status | Fires on bars | Mnemonic |
|---|---|---|
| MOD1 | 0, 2, 4, 6, 8, 10, 12, 14 | Every other bar (even) |
| MOD2 | 1, 3, 5, 7, 9, 11, 13, 15 | Every other bar (odd) |
| MOD4 | 3, 7, 11, 15 | Every 4th bar |
| MOD8 | 7, 15 | Every 8th bar |
| MOD16 | 15 | Once per cycle |
| INVMOD4 | All except 3, 7, 11, 15 | 3 out of 4 bars |
| INVMOD8 | All except 7, 15 | 7 out of 8 bars |
| INVMOD16 | All except 15 | 15 out of 16 bars |
Cross-References
- Trigs: the trig view reference, covering every status, colour and edit gesture
- Step values: per-step duty and velocity, which set the length and weight of one hit
- Mutes and row states: row play modes, including drone and legato
- Chords and scales: key and scale, which decide the notes these rows play
- Euclidean trigs: filling the gaps in a pattern algorithmically