
Playing from the browser
Every MSEQ serves a control surface to any phone, tablet or laptop on the same WiFi. It shows one player’s two Launchpads as a single 8×16 grid beside that player’s LaunchControl XL, lit exactly as the hardware is lit, and pressing anything on it does what pressing the hardware does. This page takes you from opening the page to playing a pattern.
What you need
A running MSEQ: the Pi, with a MIDI interface (a PiSound or any USB-MIDI device) connected to your synths. The browser sends no MIDI of its own. It is a remote control for the Pi, which does all the sequencing and all the sending, so the Pi and its MIDI interface are the minimum rig even when you have no Novation controllers at all. Setup covers getting that far.
Then any device on the same WiFi network as the Pi.
Open the page and pick a player
- Open
http://<your-pi-hostname>:8080/in the browser. - Enter the PIN and press Connect. It is
1234until you change it (see setup-debugging.md). - Under Select player, press P1 or P2.
A wrong PIN gives no message: the box clears and waits for another try. After a few wrong tries in a row the page shows Too many failed attempts with a countdown, and the PIN box comes back by itself when the countdown ends. Once a PIN is accepted the browser stays signed in, so reloading the page takes you straight to Select player.
On Select player, a player that no other browser is using has a gold outline. You can still pick one that is in use: that player moves to your browser, and the other browser goes back to Select player.
Picking a player means being that player. If P1 also has Launchpads plugged in, your browser and those Launchpads are two views of the same surface: they show the same sequencer and the same view, and a press on either one lands on both.
What you see
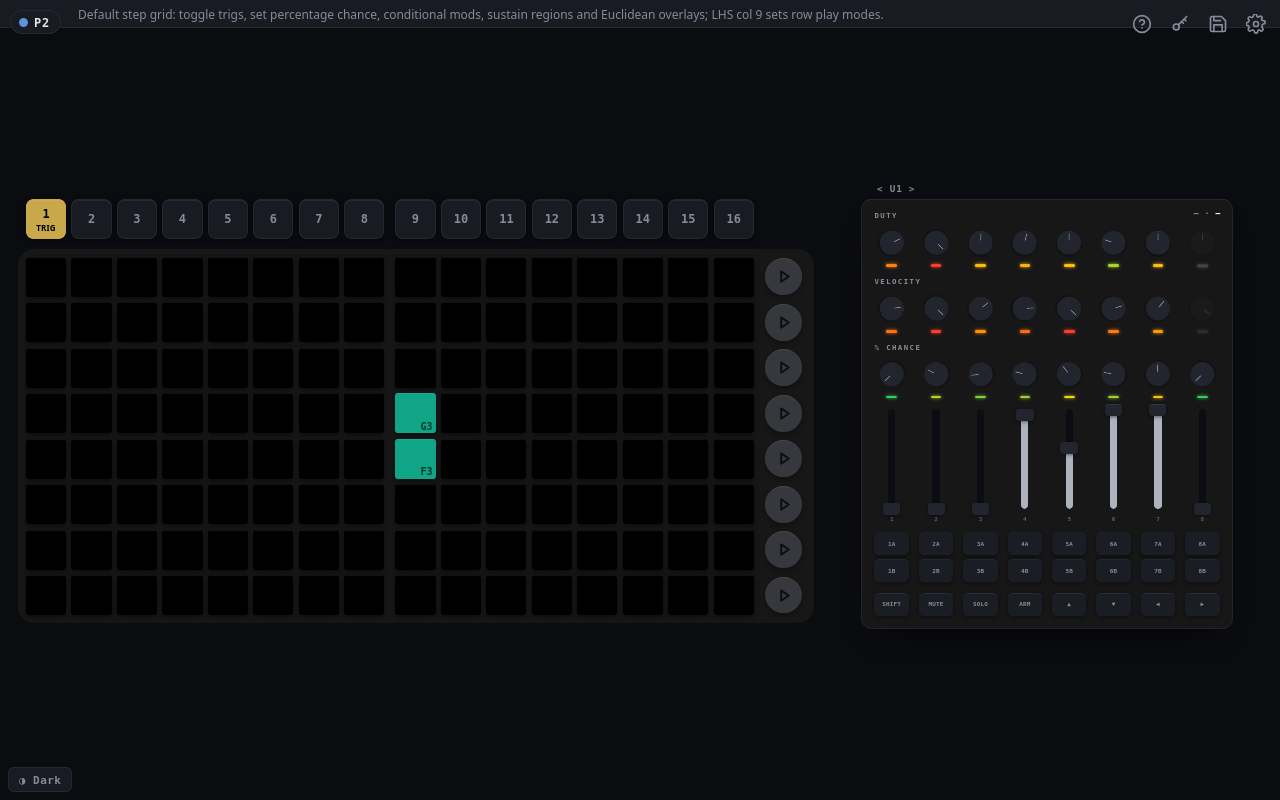
Player 2 on sequencer 1’s trig view, with two trigs written. The labels on the two lit pads are note names, which the Launchpads cannot show. The strip across the top is the hint for the current view.
From top to bottom, and left to right:
- The player badge, top left, says which player you are.
- The hint strip across the top gives the current view’s one-line summary. Hold a modifier and it changes to the gestures that modifier unlocks in this view, so you can read what SHIFT or MUTE is about to do before you press.
- The four icons, top right: the view reference (?), the colour key, Sessions, and Settings.
- The sequencer tabs, numbered 1 to 16, are the Launchpad top row. Each tab sits over the grid column it matches. The selected tab is gold and carries the name of the view you are on. The other tabs fill with their sequencer’s colour as the bars go by, the same bar count the hardware top row shows. In the note-arp view, with note-name overlays on, the current chord is shown above the round buttons (or none, when the sequencer is not following the chord progression).
- The grid is your two Launchpads side by side: steps 1 to 8 on the left half, 9 to 16 on the right, row 1 at the bottom.
- The round buttons to the right of the grid are column 9 of the left Launchpad. In the trig view they set each row’s play mode, and their colour is the row’s mute state (see Mutes and row states).
- The LaunchControl panel has the same three rows of knobs, eight faders, two rows of buttons and the modifiers as the hardware, labelled with what each knob does on that sequencer. The < U1 > button above it switches between the two banks, sequencers 1 to 8 and 9 to 16, in the same way the LaunchControl’s user templates do. The corner readout shows the last control you moved and its value.
- The theme button, bottom left, cycles Dark, Light and Auto.
Play
Pick a sequencer and a view. Press a sequencer tab. That selects the sequencer, exactly as its top-row button would, and opens a menu of its views. Pick one, or pick Trig to stay on the trig view. The menu only lists the views that sequencer has, each with the colour its column-9 button uses on the hardware. Choosing a view here is the same as pressing the right Launchpad’s column 9, so everything in Selecting sequencers and views applies.
Press pads. Tap a pad to press it. With Drag-across triggering on (the default), sliding a finger or the mouse across the grid presses each pad you pass over, which is the quick way to write a run of trigs.
Turn knobs and move faders. Drag a knob up or down to turn it. Drag a fader to move it. Double-click either one to send it back to the middle of its travel.
Hold modifiers. In the LaunchControl panel, SHIFT, MUTE, SOLO and ARM (the hardware’s REC ARM) are toggles rather than buttons you hold:
- Tap the modifier once. It lights.
- Make every press that needs it.
- Tap it again to release it.
Two modifiers together are two taps: SHIFT then MUTE gives SHIFT + MUTE. Give a modifier a moment to light before pressing a pad, because the press is read against what the sequencer thinks is held. The drawer on a phone works differently: see Where the LaunchControl goes.
What each gesture does is documented with its view, starting with Trigs. The modifiers themselves are in LaunchControl modifier buttons.
The view reference and the key
Press ? for the reference card of the view you are on: a one-line summary, then Purpose, Interaction, Shortcuts, Global gestures and See also, each of which opens when you press it. Hold a modifier while the card is open and the shortcuts that use it are picked out. The card follows you, so change view and it changes with you. Press ✕ to close it.
Press the key icon for the colour key: every trig status colour and every row mute colour, with its name. The key describes the trig view, whichever view you are on. Press the icon again to hide it.
Getting around
Everything beyond the grid is reached from the icons at the top right.
- Sessions (the disk icon) opens the save and load page, described in webapp-sessions.md.
- Settings (the cog) opens the settings page, described in
webapp-settings.md. Its Sessions group also links to
Save / load sessions and to two pages the hardware has no equivalent for:
- CC mapping, which chooses the CC each CC-arp row sends. See CC assignments.
- Arp curves, which shape what the velocity and duty arp values mean. See Arp curves.
Each of those pages has a ← at the top left that takes you back.
When the page is showing only the view reference (see Screen sizes), the icons are replaced by a round ⚙ button in the corner. That is the way in to Settings, and Sessions, CC mapping and Arp curves are reached from there.
Screen sizes
What you get depends on the size of the screen and which way up you hold it. The grid needs the screen on its side and at least 850 by 400 pixels of page to draw in.
| Screen | What you get |
|---|---|
| Held upright, or smaller than 850 pixels wide | The live view reference (see A phone beside the hardware), with a ⚙ button for Settings |
| A large phone on its side, in the browser | An Add to Home Screen prompt above the view reference |
| A large phone on its side, opened from the home screen | The grid, with the LaunchControl in a drawer |
| A tablet on its side, or a laptop | The grid, the sequencer tabs, the hint strip and the full LaunchControl panel |
On a large phone the browser’s own toolbars take just enough height that the grid does not fit under them, which is what the prompt is for. Add the page to your home screen (Share, then Add to Home Screen on iOS; the browser menu, then Add to Home Screen on Android), open it from there, and hold the phone on its side: without the toolbars, the grid fits. A smaller phone does not reach 850 pixels wide even then, and stays on the view reference.
A phone shows the grid, the round buttons and the drawer, but no sequencer tabs and no hint strip. It plays whichever sequencer and view your player is on. To change those, use a larger screen signed in as the same player, or the Launchpads.
A phone beside the hardware
Held upright, a phone becomes a context-aware reference card. It knows which sequencer and view your player is on, shows the help for exactly that, and changes by itself the moment you change view on the Launchpads. Prop it up next to the hardware, sign in as the player whose Launchpads you are playing, and it keeps up with you for the whole set without a single tap.
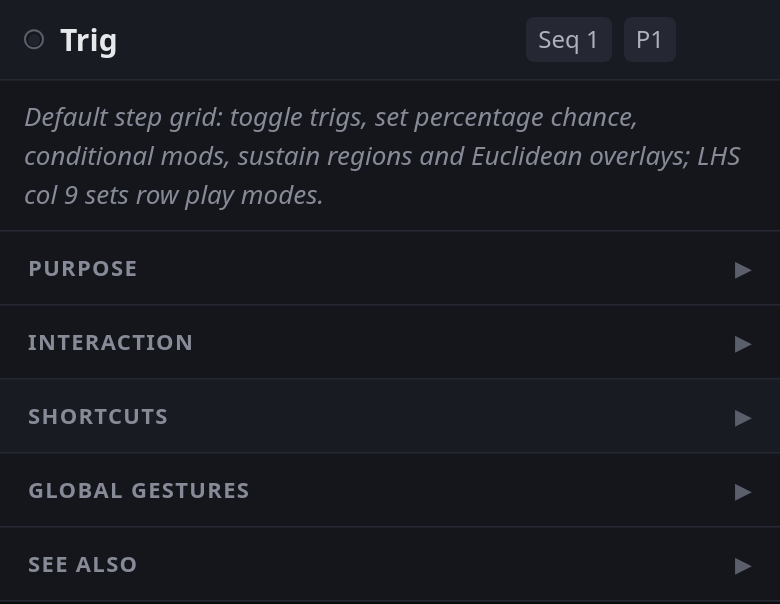
On sequencer 1’s trig view, the card is the trig view’s card. The heading names the view and the sequencer, so you can see at a glance that it is keeping up.
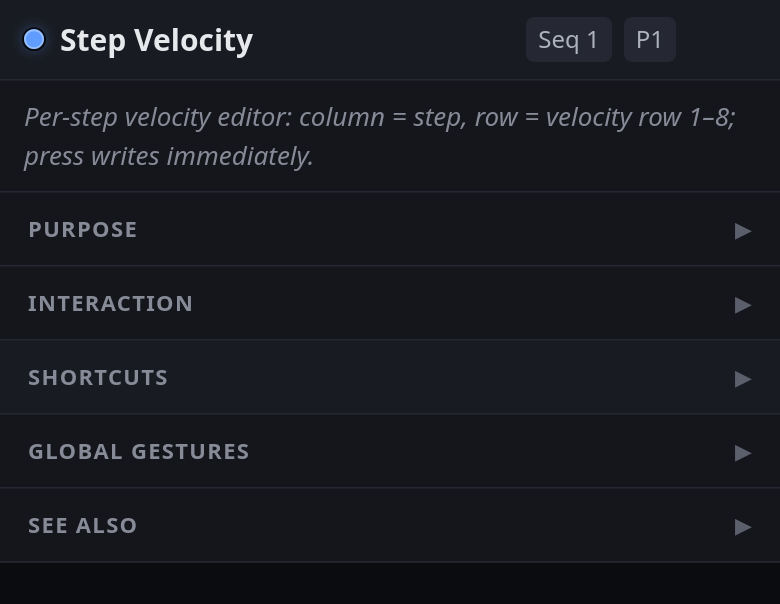
Change to the step velocity view on the Launchpads and the card follows, heading and summary included.
Each section opens when you press its heading.
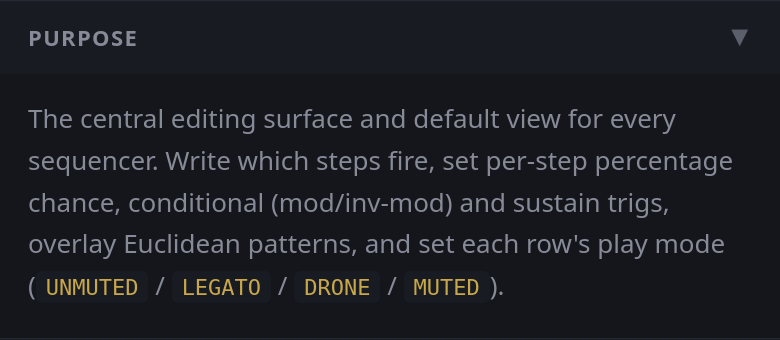
Purpose: what the view is for, in a paragraph.
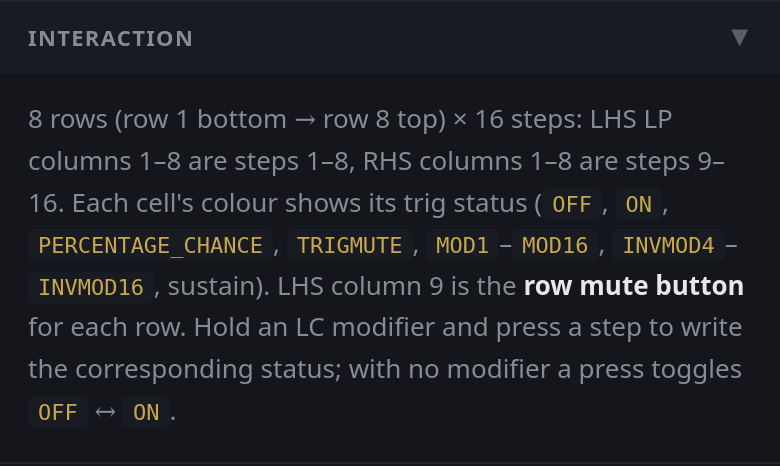
Interaction: how the grid is laid out and how a press is read.
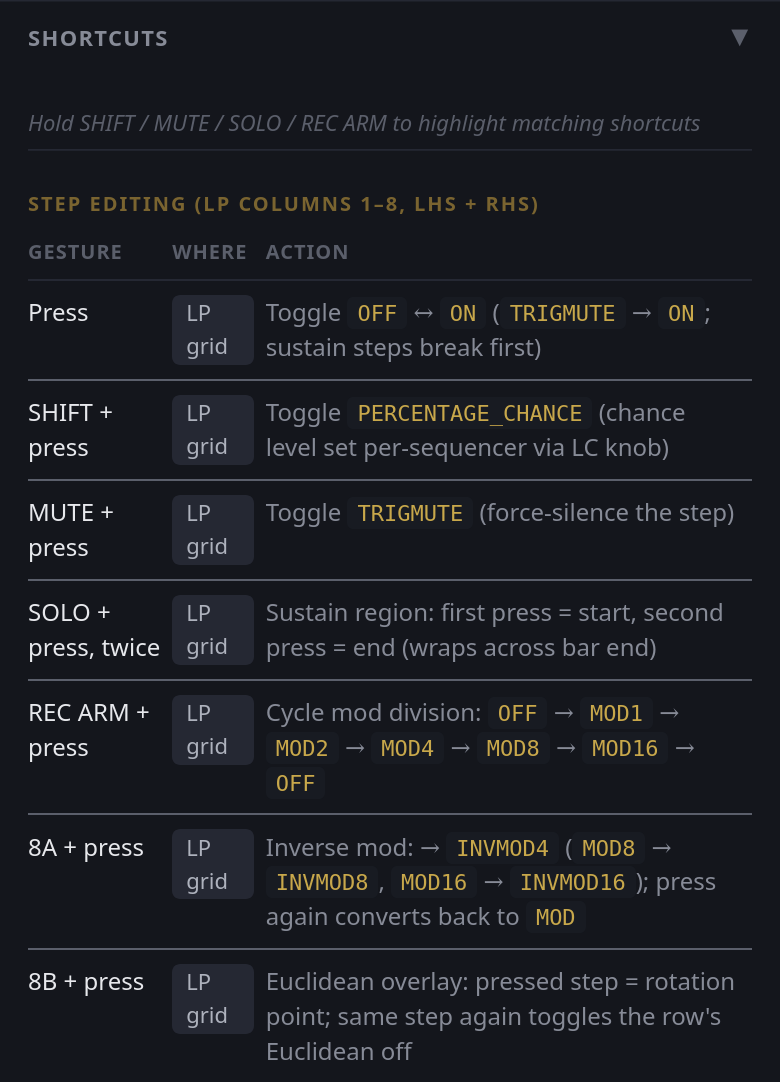
Shortcuts: every gesture the view answers, where you make it, and what it does. This one is open when the card first appears.
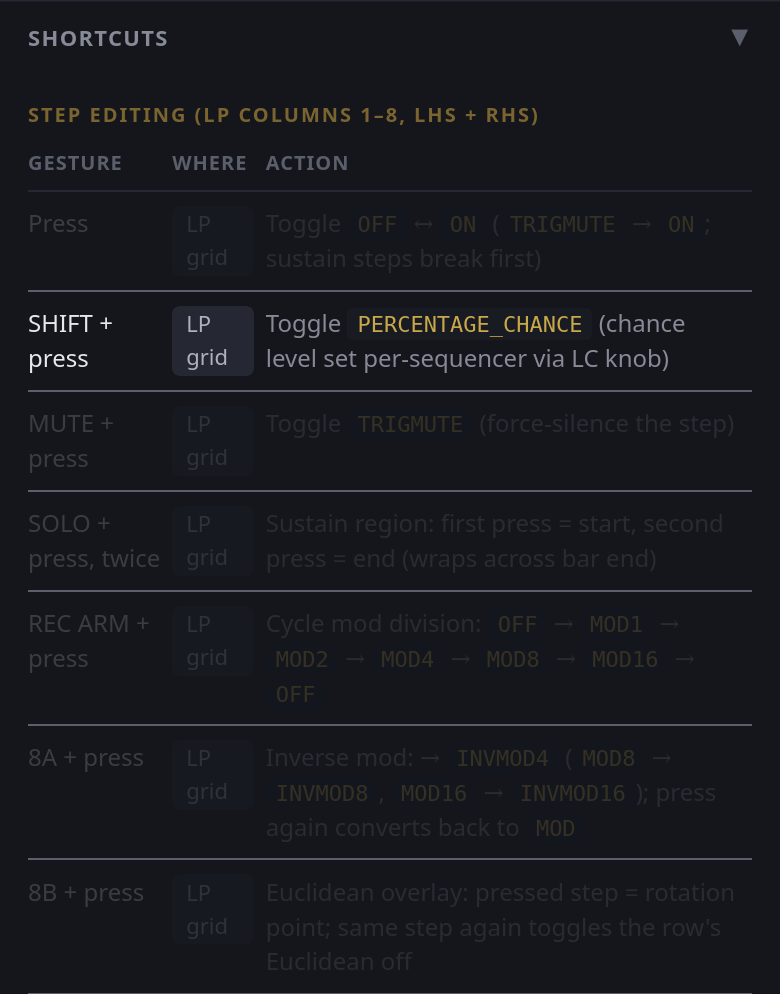
Hold a modifier on the LaunchControl and the card follows your hands too: the shortcuts that use it stay bright and the rest fade. Let go and the full list comes back.
Global gestures lists the gestures that work in every view, and See also points to where to read more.
The card only reads: nothing on it presses anything on the rig. Each player can have their own, signed in as themselves, and each one follows its own player. On larger screens the same card is behind the ? icon.
Where the LaunchControl goes
The LaunchControl appears in one of two forms.
- The console is the full panel: all eight columns of knobs and faders, both rows of buttons, the modifiers and the arrow buttons.
- The drawer is a panel that slides up over the grid and carries only the selected sequencer’s column: its fader, its three knobs, its two buttons (A and B), and the four modifiers. Its heading says which sequencer it is controlling. Tap or drag the handle at its top edge to put it away and bring it back.
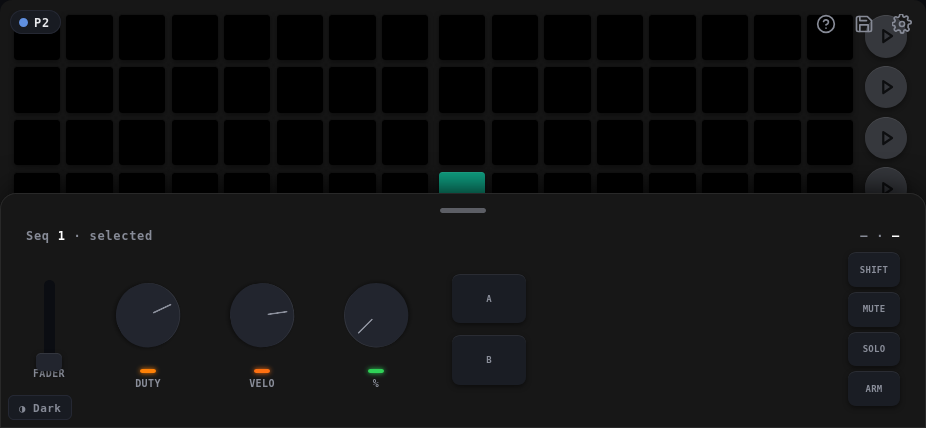
The drawer open on a phone. Everything in it acts on sequencer 1, the sequencer the player is on.
In the drawer, the modifiers are held rather than toggled: keep a finger on SHIFT and press a pad with another. That is the natural way to use two thumbs on a phone, and the reverse of the console, where a single mouse pointer cannot hold one button while pressing another.
Which form you get is the LC layout setting, which is Auto unless you change it:
| LC layout | Phone on its side | Tablet or laptop |
|---|---|---|
| Auto | Drawer | Console beside the grid |
| Drawer | Drawer | Drawer over a grid that uses the full width |
| Console | Console below the grid | Console beside the grid |
While the drawer is showing, the colour key is not available: the key icon disappears, because the key and the drawer would share the bottom edge of the screen. Choosing the layout therefore also chooses whether you have the key while you play. Change it under LC layout in Settings.
When something goes wrong mid-set
Three banners can appear across the top of the page.
- Reconnecting… The browser has lost its connection to the Pi, usually because the WiFi dropped or the webapp restarted. Wait: it reconnects on its own and picks your player back up, with no PIN and no Select player.
- MSEQ not responding… The page is connected, but the sequencer itself is not answering, so the grid stops changing. The webapp and the sequencer are two separate programs on the Pi, and this banner means the webapp is fine and the sequencer is not. setup-debugging.md covers restarting it.
- MIDI unavailable, followed by a note that input is disabled. The webapp cannot reach the sequencer’s input ports, the virtual MIDI ports that carry browser presses into it, so your presses from this page will not register. It says nothing about the MIDI going from the Pi to your synths: the webapp has no way to see that, and the music can keep playing while this banner shows. Restarting MSEQ rewires the ports.
If the page will not load at all, or never gets past the PIN, work through setup-debugging.md.
Cross-References
- webapp-settings.md: every row of the Settings page
- webapp-sessions.md: saving and loading from the browser
- Selecting sequencers and views: how sequencer and view selection behave, on the hardware and here
- LaunchControl modifier buttons: the LaunchControl modifiers
- Setup: the rig this page assumes